
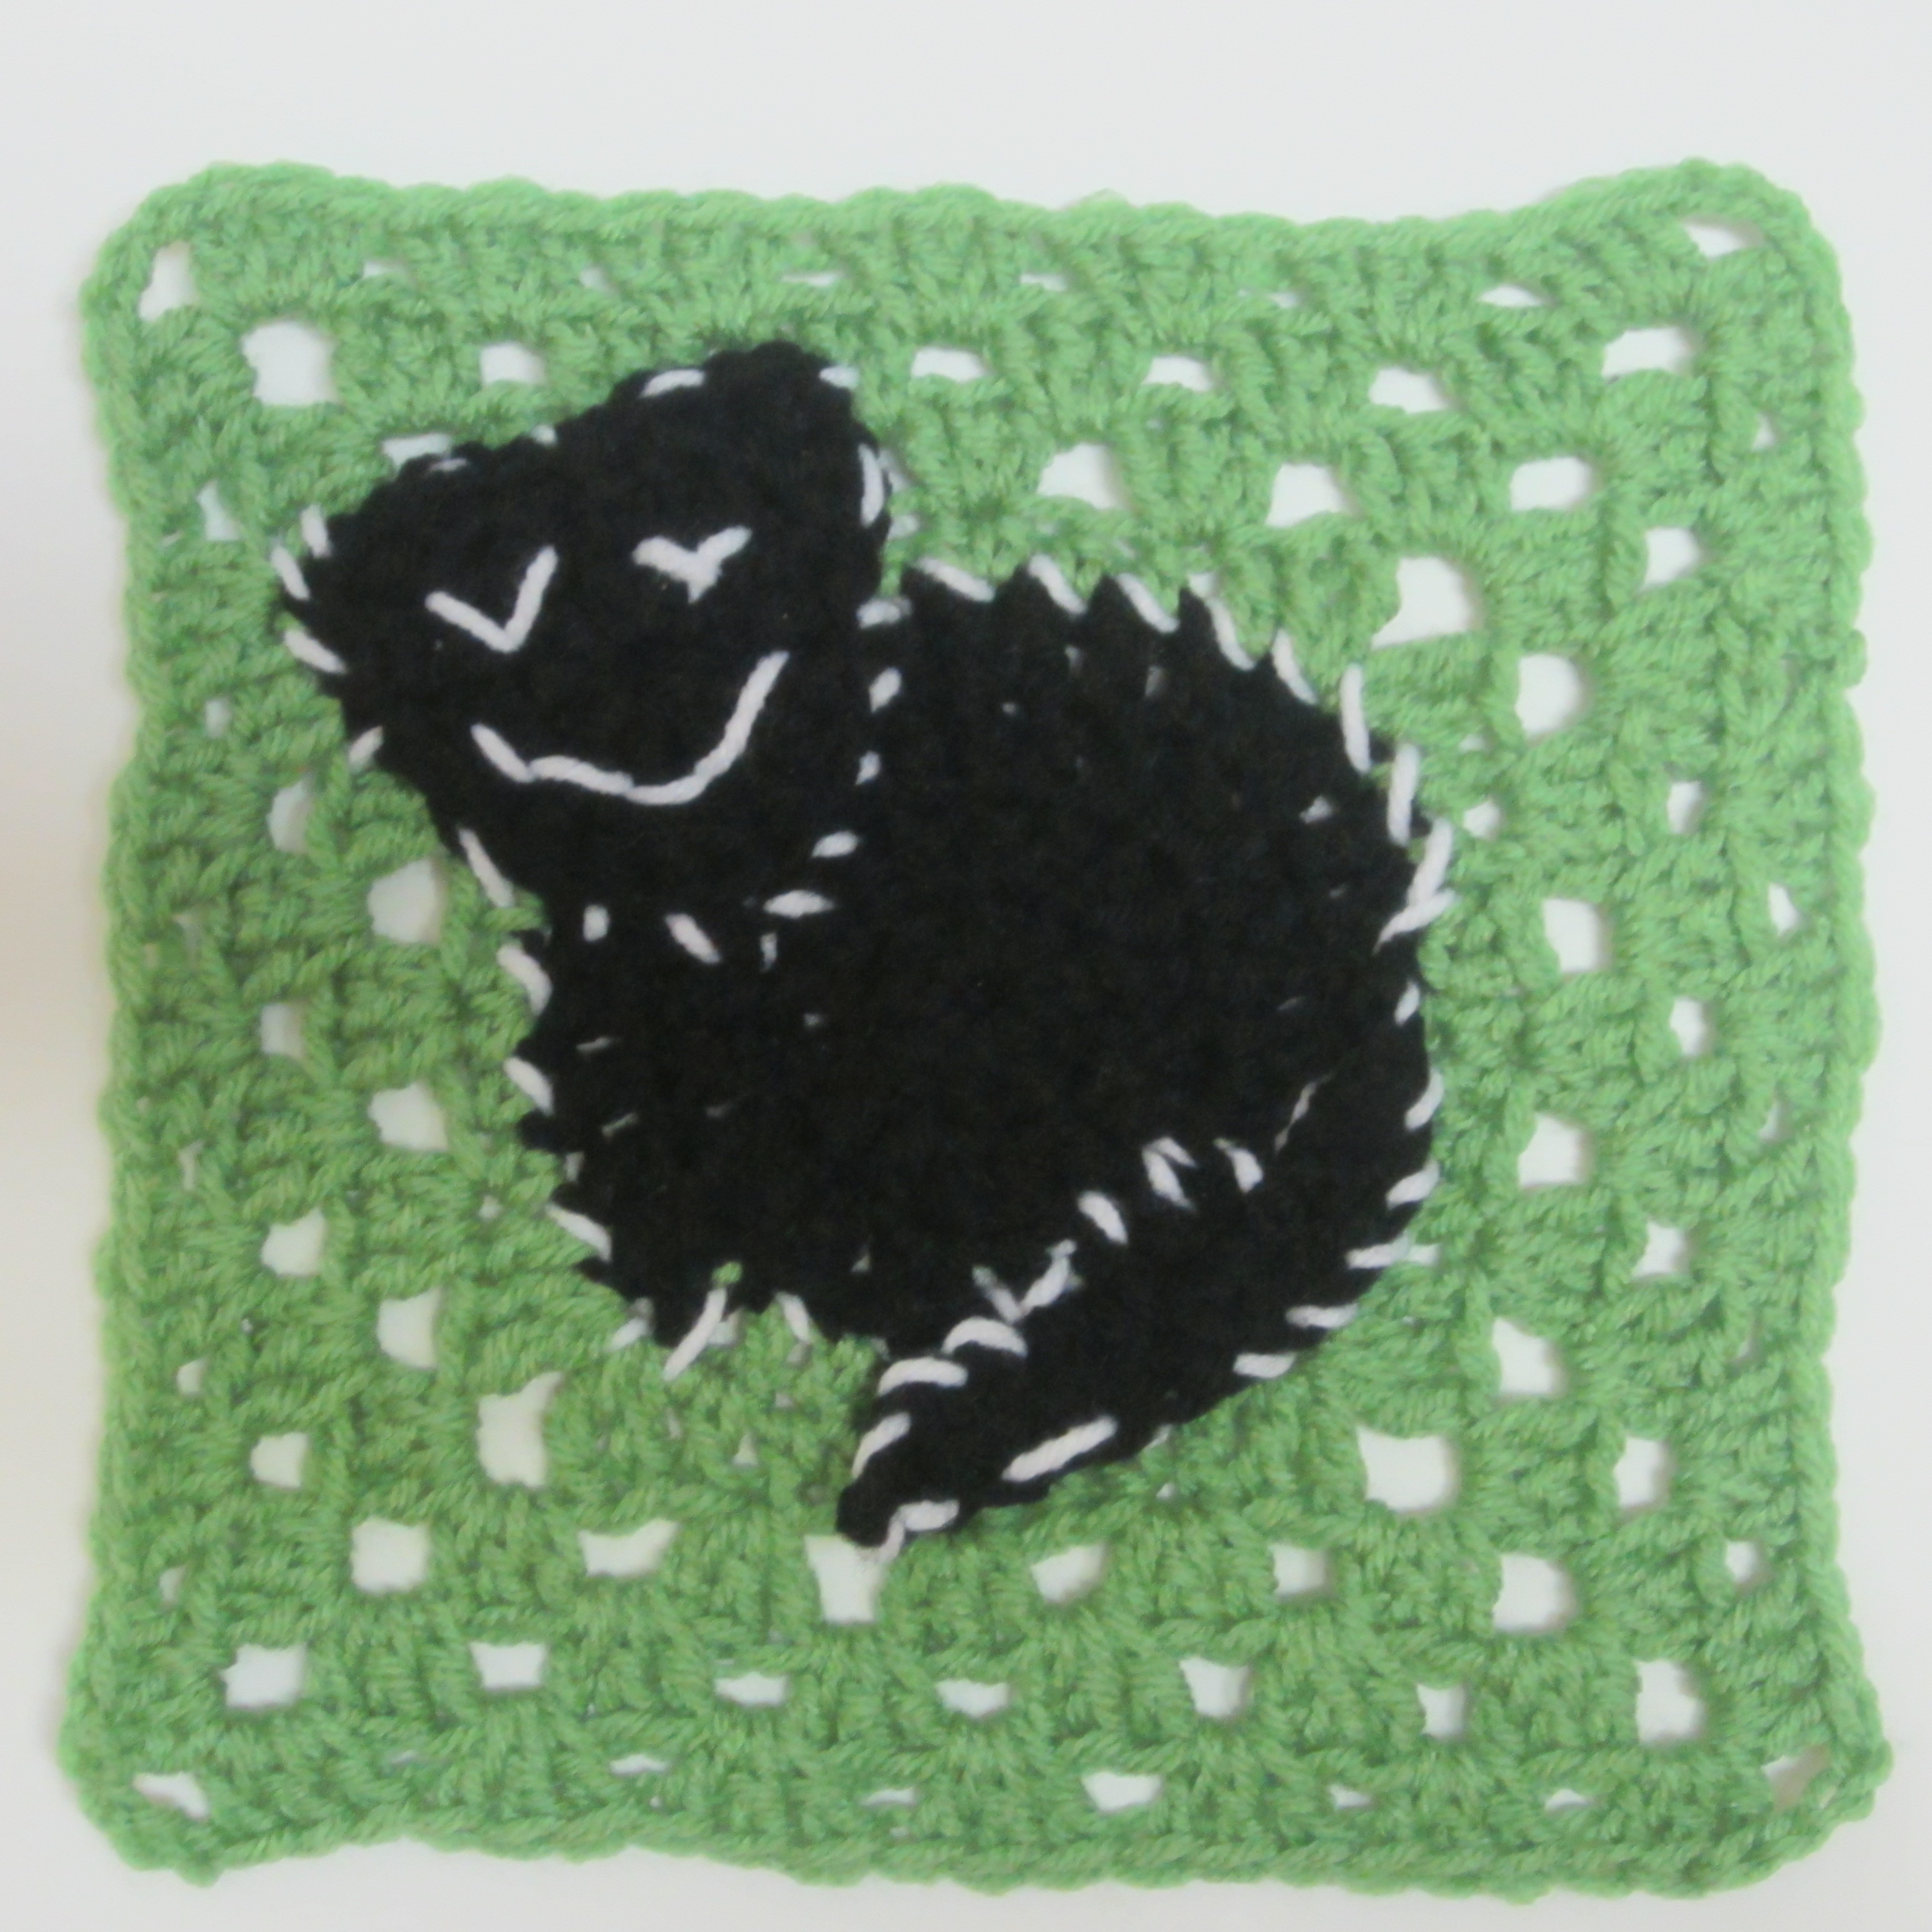
Cat Square Pattern
I use a size K (6.50MM) hook and Red Heart Super Saver Yarn.
Color A: Cat head and body color
Color B: Background square color
Color C: Color to stitch around the cat’s body.
Note* You might want to scan down through the pattern before you get started so you don’t get confused around the tail forming area. Where the tail is supposed to be, you will change colors to the background color (not the tail color) and work in the back loops to the end of the round and THEN join with the tail color, pivoting the square and working in the opposite direction in the FRONT loops that you just skipped. So don’t panic when I have you change to a background color as if we’re forgetting the tail, haha! Doing it this way will give the tail it’s 3-D effect. And for the little point end of the tail you’ll be chaining a few extra and then working back up that chain in the orignal direction. Then you’ll go back to where you left off with the background color to finish working around the square in the original rounds. Make sense?
Another Note* The head is made separately and then stitched on when the square is complete so that you can make the kitty as perky, sleepy, or curious as you want depending on where you place the head. I guess if you want you could put it up-side-down and have a possessed kitty…but that might frighten the friend you give the blanket to, so I wouldn’t recommend it. *snort* But if anyone does that you should add creepy ‘x’ shaped eyes or eyes that are two obvious different sizes. Just sayin’…
Pattern:
Rnd 1: With Color A: Ch 3, 8 dc in 3rd ch from hook. Jn with a sl st in first ch. (8 dc not including first ch-2.)
Rnd 2: Ch 2, 2dc in same st and each st around. Jn with a sl st in first dc. (16 dc not including first ch-2.)
Rnd 3: Ch 2, dc in same st, 2dc in next st, (dc, 2dc) around. Jn with sl st in first dc. (24 dc not including first ch-2.)
Rnd 4: Ch 2, dc in same st and next st, 2dc in next st, (dc, dc, 2dc) 4 times. Fasten off. Switch to color B. Jn with a sl st in top of your last dc to begin where you left off. Working in the back loops only of the last 9 sts, (dc, dc, 2dc) 3 times. Jn with a sl st if first dc.
Leave the background color yarn where it is for the moment because you will pick up right there when you move on to round 5, but now instead we’re going to pivot the project and work back in the front loops we just skipped to make the tail of the kitty.
Tail: Jn color A with a sl st in the front loop that was left open in your very last st of Rnd 4 before you joined the rnd. working in this loop and in the extra loops back in the direction of where you first joined the background square color B: ch 1, (sc, dc) in the same loop, dc, dc, 2dc, dc, dc, (dc, ch-2, sl st) in the next st. Ignore the last 2 free loops. Instead create a little tip of tail that isn’t attached to the original circle by chaining 3 and then sc in the 2nd ch from hook, hdc in the last ch, and then join that with a sl st in the top of the last dc/ch-2 of the main part of the tail. Fasten off.
Rnd 5: Now back to where you left off with the original circle. In this round we’re giong to turn the work into a square. Ch 2, hdc in same st and in the next st, dc, (dc, tr, ch 3, tr, dc) in next st to create corner. *Dc, hdc, hdc, 2hdc, hdc, hdc, dc, (dc, tr, ch 3, tr, dc) in next st making next corner. Repeat from * two more times. Dc, hdc, hdc, 2hdc. Jn with sl st in the first hdc.
Rnd 6: Sl st in the next st. Ch 2, 2dc in same st. Sk next 2 st, (3dc, ch 3, 3dc) in corner. * (Sk next 2 st, 3dc in the next st) 3 times, sk next 2 st, (3dc, ch 3, 3dc) in corner. Repeat from * two more times. (Sk next 2 st, 3 dc in next st) twice. Sk last 2 st, work one dc in the same st as the very first ch-2/2dc of the round.
Rnd 7 : Sl st to the next space between fans. Ch 2, 3dc in same space. 3dc in each space between fans around, accept in each corner work (3dc, ch 3, 3dc). Jn with a sl st in first dc.
Rnd 8: Ch 2, 3dc in same space. 3dc in each space between fans around, except in each corner work (3dc, ch 3, 3dc). Jn with a sl st in first dc.
Head:
Rnd 1: With color A, ch 3, 8 dc in the 3rd ch from hook. Jn with a sl st in first dc.
Rnd 2: Ch 2, 2dc in same st and each st around. Jn with a sl st in first dc. Do not fasten off. Continue on to ears.
Ears:
Ch 1, (sc, hdc, ch 1, dc, ch1) in next st, (not the same st as the ch-1, but the next st.) (hdc, sc, ch 1) in the next st, sl st in the next 2 st. Ch 1, (sc, hdc, ch 1, dc, ch 1) in the next st, (hdc, sc, ch 1) in the next st. sl st in the next st. Fasten off and sew head in place on square.
Finishing:
Weave in all the ends and then stitch head to body with Color C. Stitch around the cat’s body and tail with color C as well. Don’t stitch the tail to the square, but stitch around it as a border.
I would also like to note that my inspiration for making this kitty square can be found here: Here Kitty, Kitty – 12″ Square by, Melinda Miller. My square is only about 8″ and since I like instant gratification I usually design my stuff to whip up faster than other more solid designs, which are also beautiful in my opinion! I think mine has a festive native kind of look to the head shape and the spiral outline. I think I achieved a nice blend of elegance, modern art, and primitive all at the same time, which is totally what I was going for, lolz! I’m very pleased with it!


