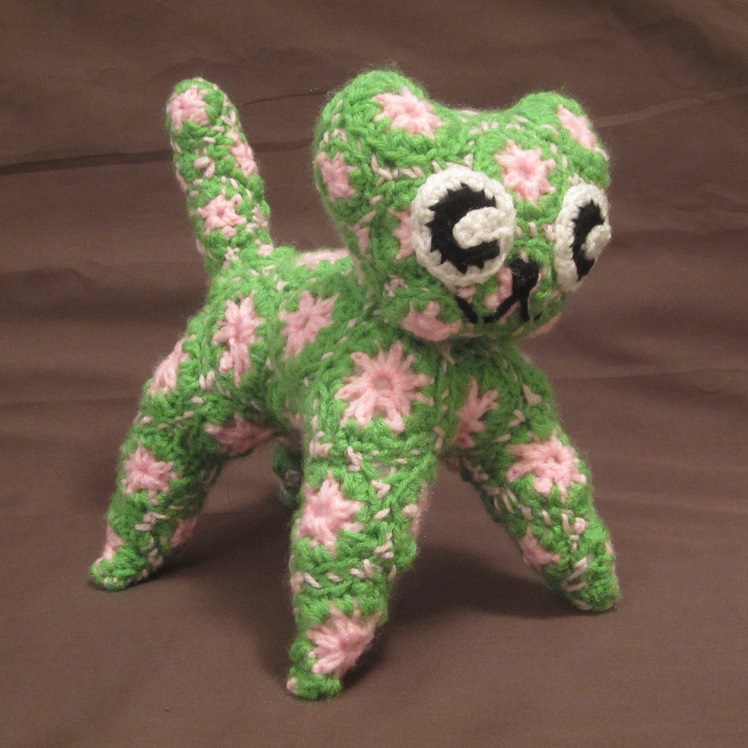


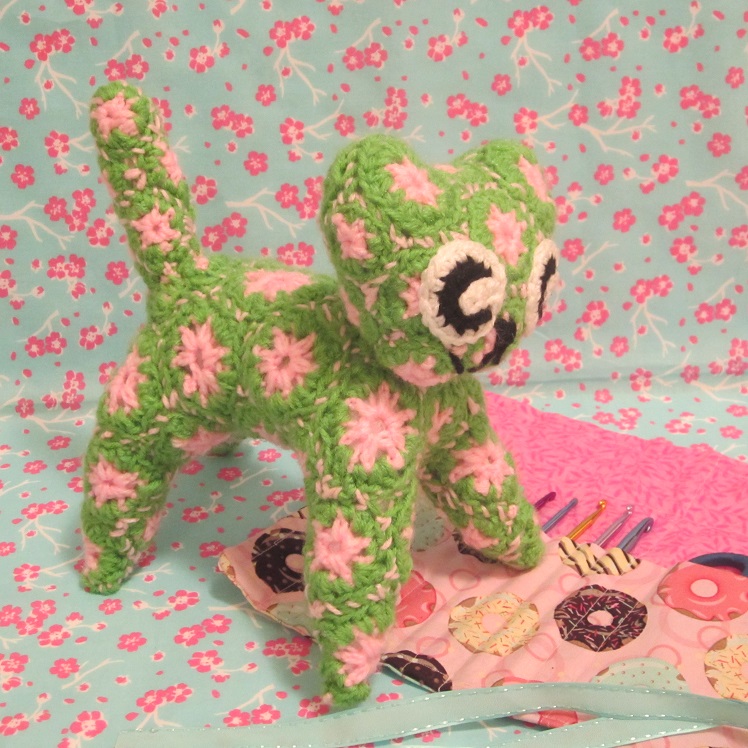
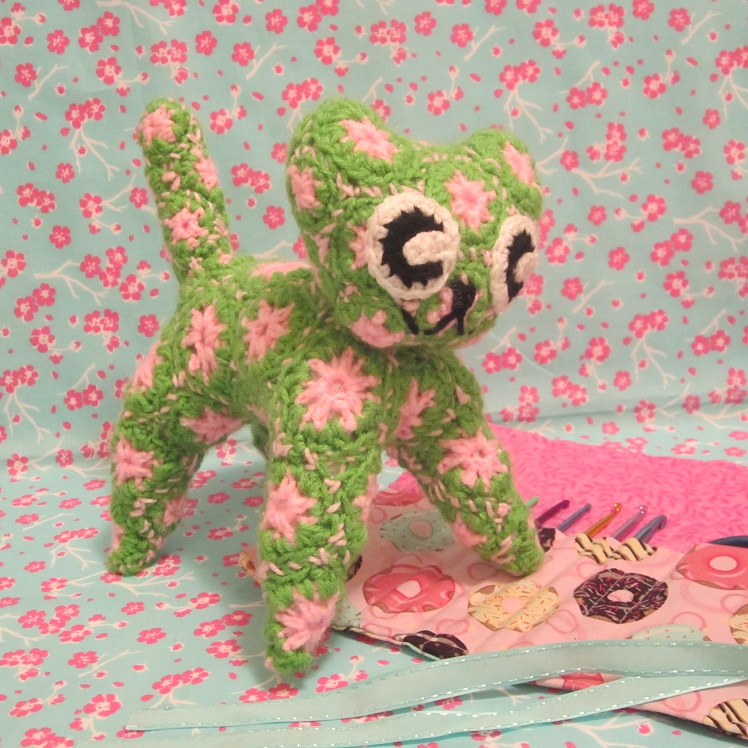
Starling’s Crochet Anime Kitty
* I use Red Heart Super Saver Yarn, a yarn needle, and an F and a K hook. For the body and for ALL squares, use a K hook. For the head motifs use an F hook.
__________________________________________________________
Number of Motifs
Head: (Remember to use an F hook on all of these.)
9 hexagons
4 squares
4 altered hexagons for the ears
Body: (Remember to use a K hook for all of these except for F hook on the 4 squares.)
21 hexagons
10 pentagons
4 squares
Tail: (Remember to use an F hook for all squares.) 8 squares
_________________________________________________________
Hexagon, Pentagon, and Square, and Ear Pattern
Hexagon:
Ch 4, jn with a sl st in first ch to form a ring.
Rnd 1: (Sc, ch 2) into the ring 6 times. Jn with a sl st in the first sc.
Rnd 2: Jn with a sl st in any sc. *Sc into the sc stitch, (sc, dc) into the ch-2 space. Repeat from * around. Jn with a sl st in first sc.
Square:
Ch 4, jn with a sl st in first ch to form a ring.
Rnd 1: (Sc, ch 2) into the ring 4 times. Jn with a sl st in first sc.
Rnd 2: Jn with a sl st in any sc. *Sc into the sc stitch, (sc, dc) into the ch-2 space. Repeat from * around. Jn with a sl st in first sc.
Pentagon:
Ch 4, jn with a sl st in first ch to form a ring.
Rnd 1: (Sc, ch 2) into the ring 5 times. Jn with a sl st in first sc.
Rnd 2: Jn with a sl st in any sc. *Sc into the sc stitch, (sc, dc) into the ch-2 space. Repeat from * around. Jn with a sl st in first sc.
Altered Hexagon for Ears:
Rnd 1: Using an F hook like for the other hexagons, Do this round the same as Rnd 1 for the above hexagon.
Rnd 2: In this round switch to a size K hook. Jn with a sl st in any sc. Ch 1, sc into the same st, (sc, dc) in ch-2 space. Repeat from * one more time. Hdc in next sc stitch, 2hdc into the ch-2 space, hdc in next sc, (hdc, dc, hdc) in next ch-2 space, **hdc in the next sc, 2hdc in next ch-2 space. Repeat from ** one more time. Jn with a sl st in first sc.
______________________________________________________
Placing of the Shapes
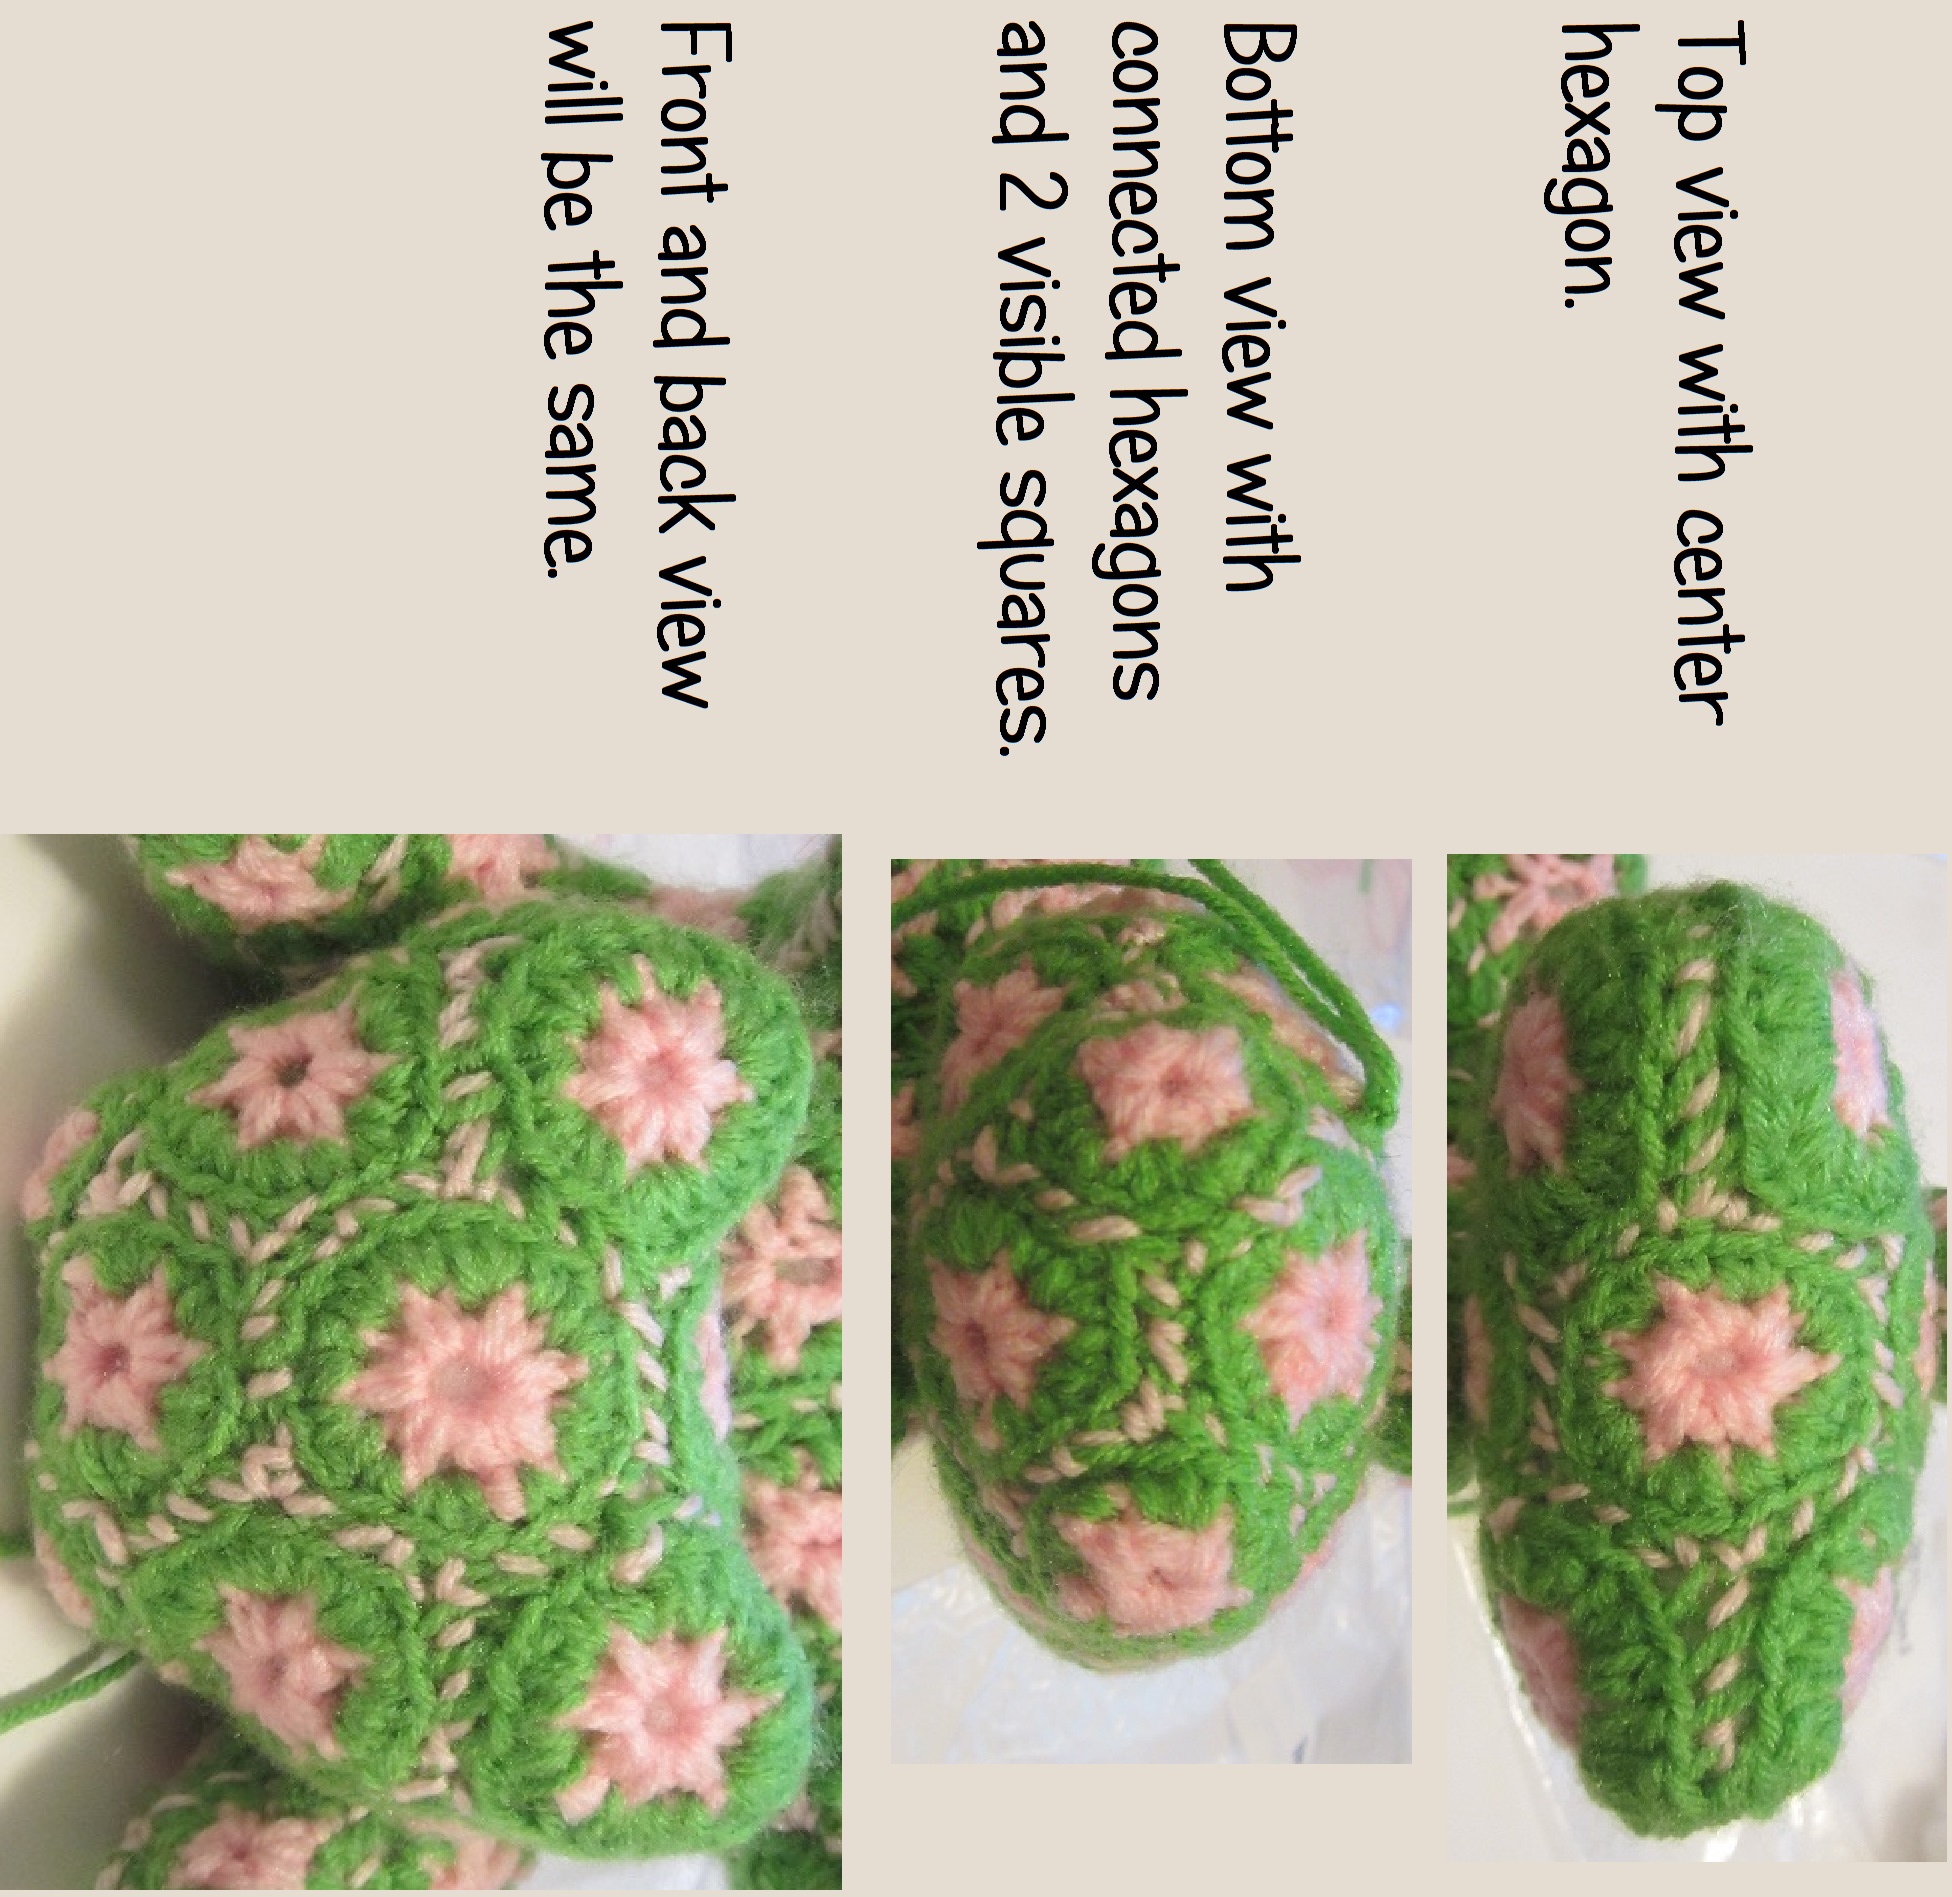
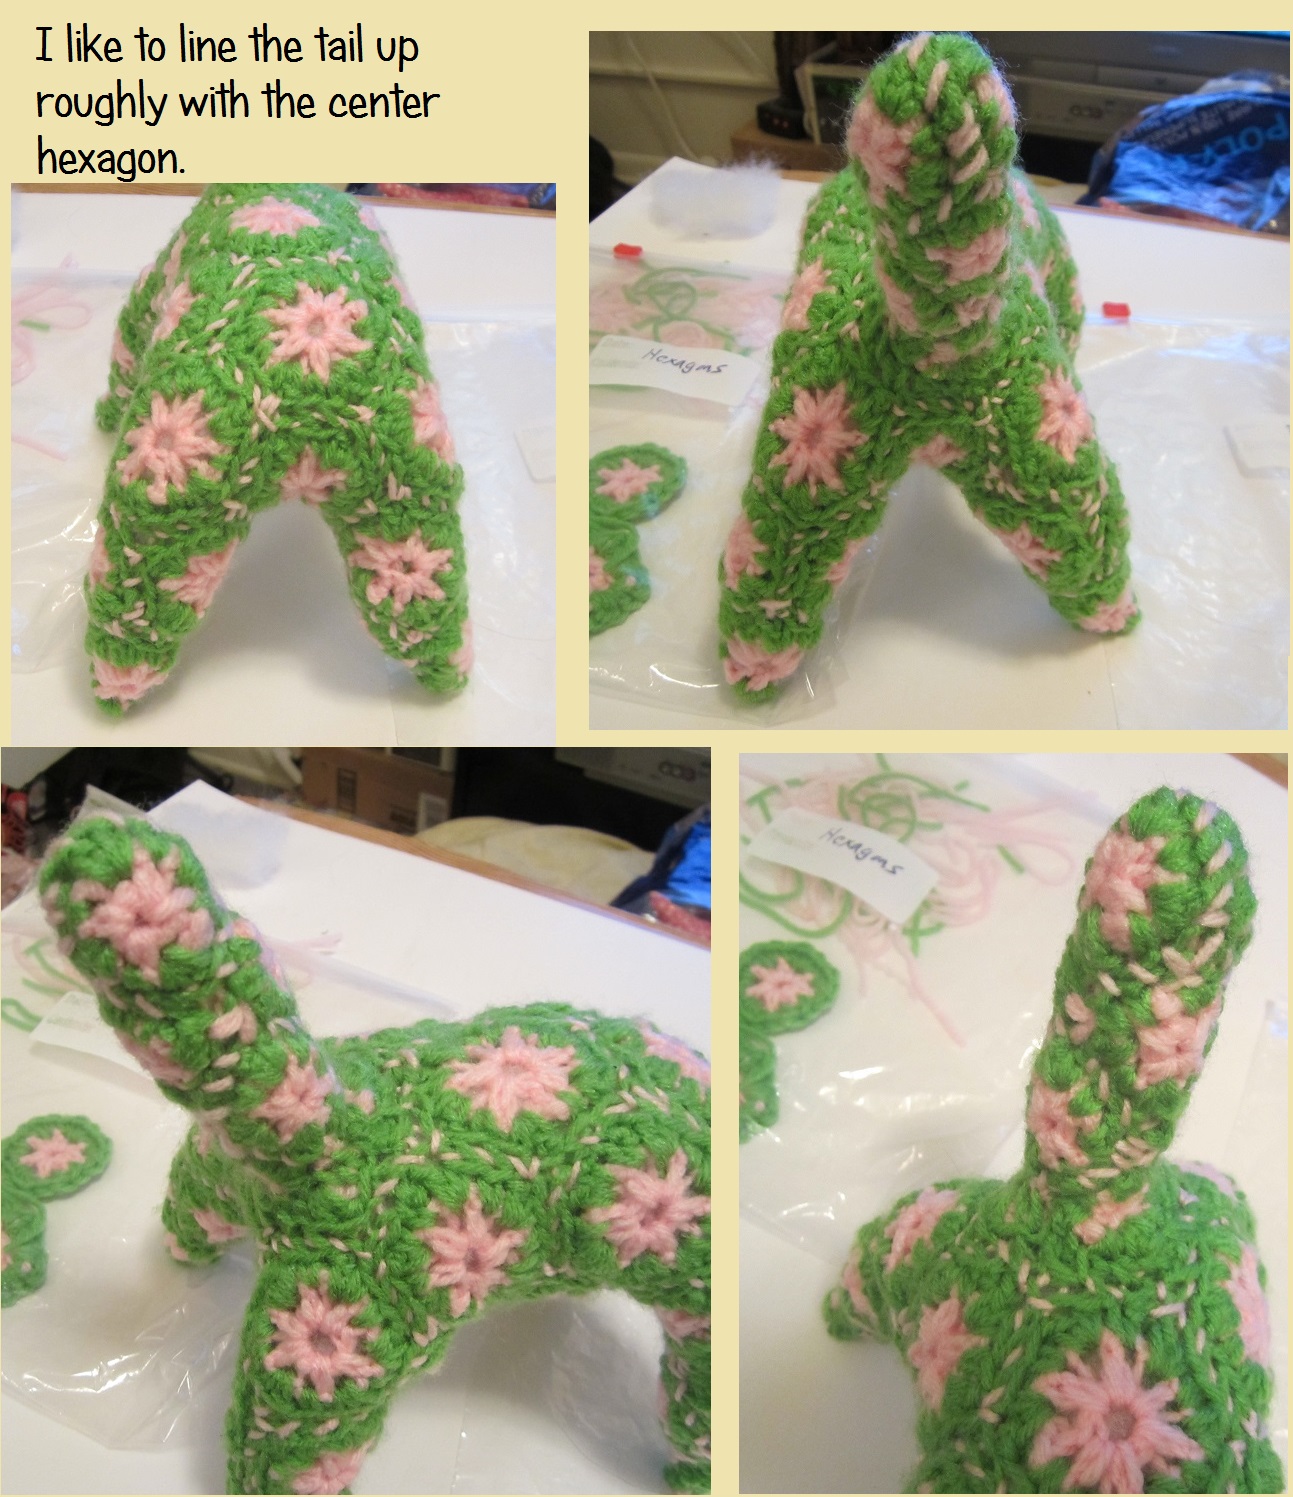
For the tail, I put the top two squares together point-up…so I guess they’re technically diamonds. *Snort*. I sew the top two sides together, and then the next 2 squares fit into the angle that the remaining unworked sides make. I continue on like that until the tail is as long as I want it to be. When attaching the tail I mush the last two points down against the hexagon on the body in the ‘tail spot’ and use that as a rough guide to attach the tail. So if you’re making a bobcat kitty, you can use less squares and make a stubby tail.
For the body, the 5 hexagons make each of the sides, and the hexagons make up the rest. The placing of the hexagons in the corners can be tricky, but you can do it!
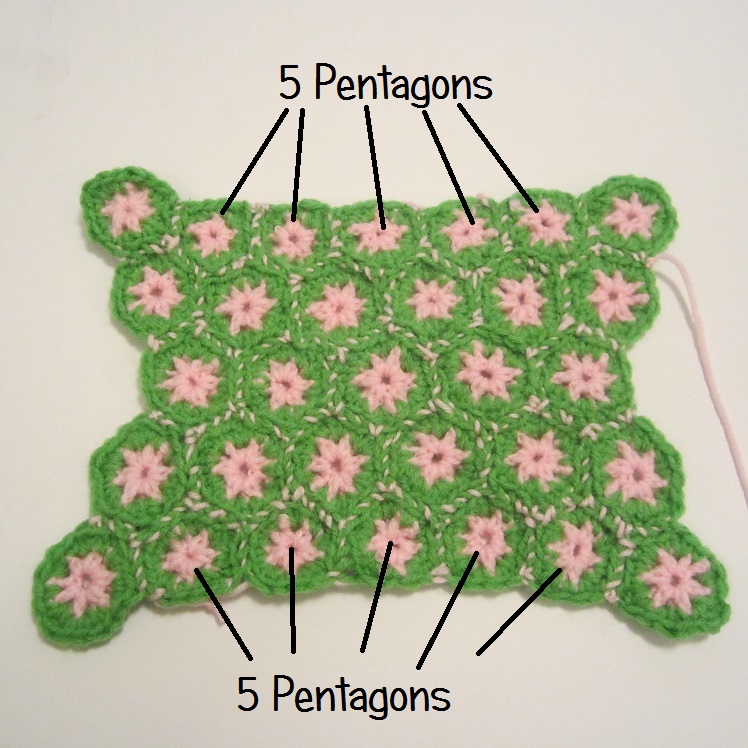
The rest are hexagons.
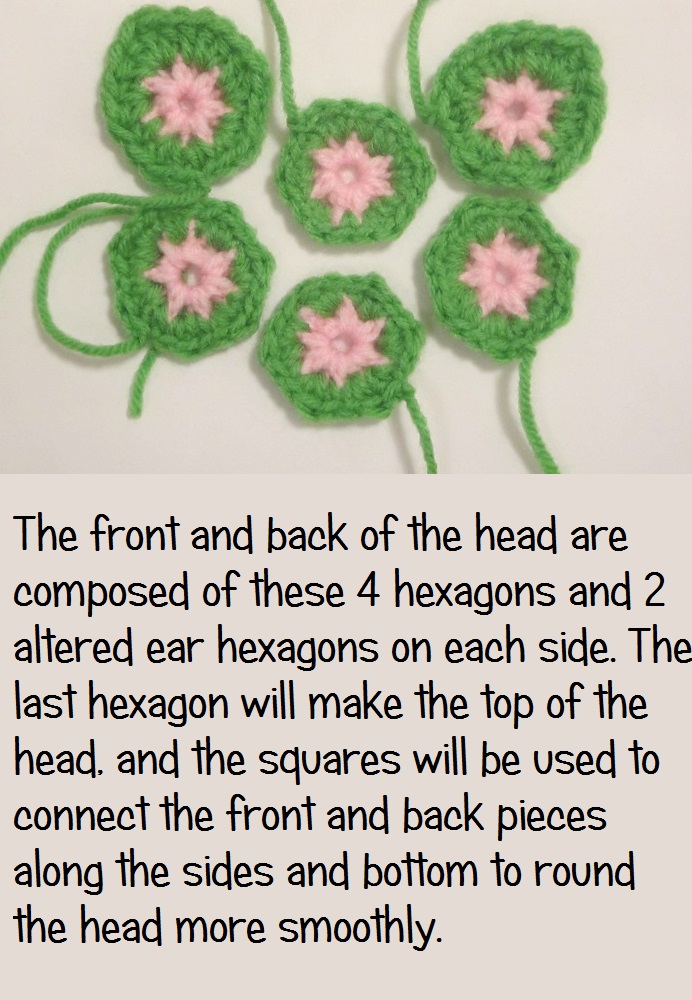
For the head, the squares are used to create the filler on the bottom and on the sides, and one hexagon will be the top of the head. The front and back of the head are constructed in the same way, so I make those first and then try to stitch the others in place as I join the front and back.

_____________________________________________________
Joining
I often times like joining by using the back loops only, but if you join with the entire stitch, I think that will be cute too! I use a yarn needle, and I like to use a different color yarn so the stitches stand out against the edges for a Frankenstein kinda look. If you want it to blend in the simply use the same color as the outside of your shapes.
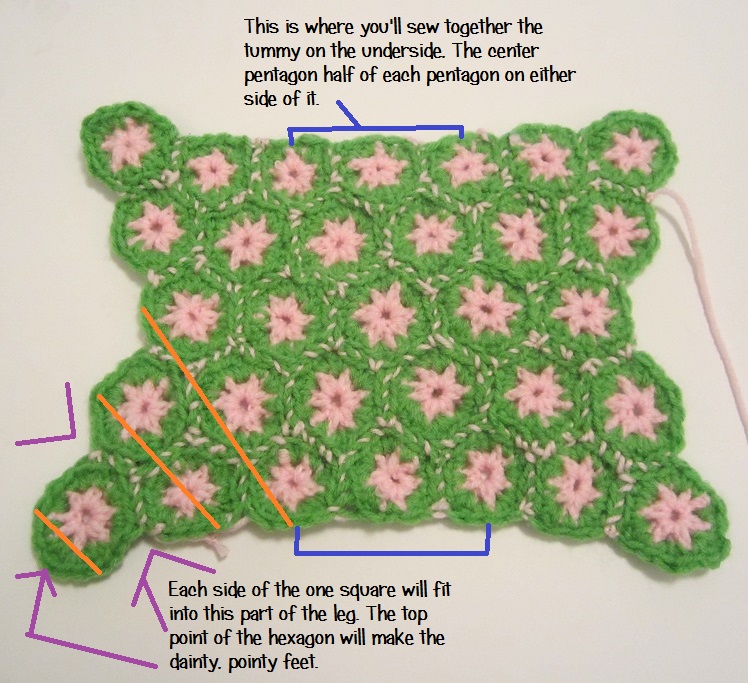
For the feet, you want to try and make them pointed, so the point of the bottom hexagon will fold in on itself and you stitch it together, but the space between the attached shapes make a perfect spot to add a square. You can tell where the one square will go on each leg when you pinch the leg in half. It might be easier to decide if you’re connecting the legs to the right edges if you connect the center of the body first. the very middle pentagon, and the half of each pentagon on either side of it, will be stitched together directly across. If you do that first or at least hold that part together it might be easier for you to keep up with evenly stitching up the leg. If you are slightly off, you don’t have to worry too much because it will most likely just give the cat a look as if he is taking a step. If you’re off a lot then I don’t know what kind of H.P. Lovecraft creature will come out of it….hehehehehe…
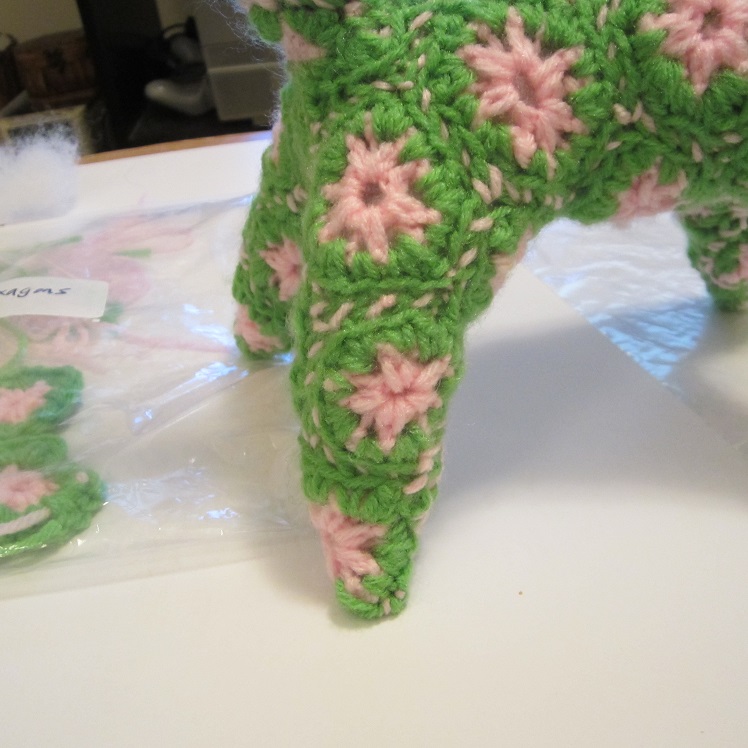
Oh…dat leg…
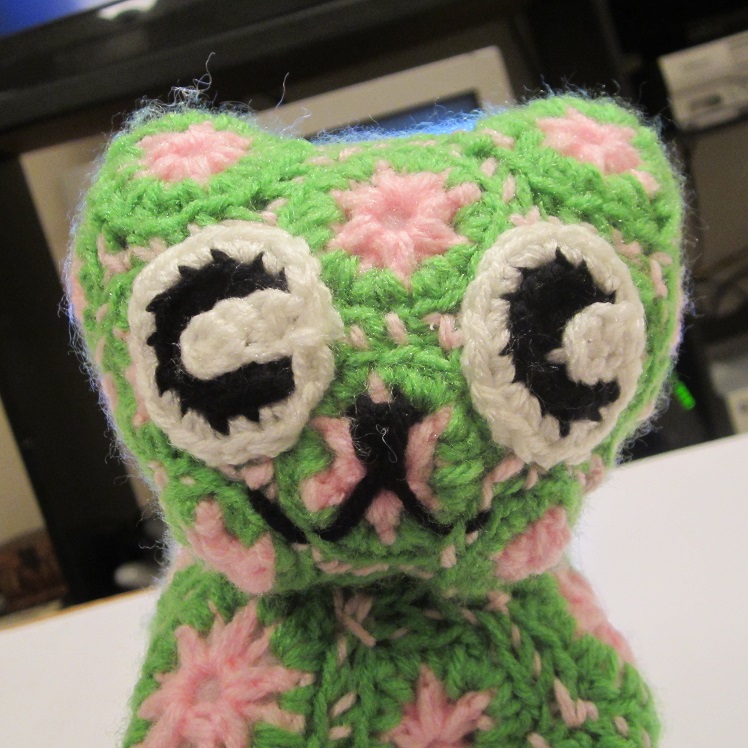
Then all you need to do is stitch on a little nose and mouth, and decide whether to use buttons or the anime eyes. If you want anime eyes:
Use F (3.75 MM) hook for the eyes.
(Make two.)
Rnd 1: With black, Ch 2, 6 sc in 2nd ch from hook. Do not join. (6 sc)
Rnd 2: 2 sc in each st around. Jn with sl st in first sc. Fasten off. (12 sc)
Rnd 3: With white and working in back loops only, join with a sl st in any sc. Ch 1, 2 sc in same st as join, sc in back loop of next st, (2 sc in the back loop of next st, 1 sc in back loop of next st) around. Join with a sl st in 1st sc. Don’t fasten off. (18 sc) For pupil, you will now chain 4 and sc in 2nd chain from hook and next 2 ch. Sl st in front loop of next st. Fasten off with tail long enough to sew pupil to eye and the eye to head. Fold strip down into the black of the eye and sew it into place.
Pattern by Starling of Craftyghoul

I’m sorry, but did I miss something. In each piece there are 2 rows that you join, No place does it tell you when to change colors or how to make the hexagon, pentagon, square, etc. It says the 2 rows & then goes on to tell you how to join them.
At the top after the pictures it explains how to make each shape. There are two rounds to each shape. You do the rounds in whatever color you would like. I did the first round in pink and the second round in green. If you don’t change the color then you continue on to round two. If you do change the color then you fasten off after round one and join in the same place you fastened off with the new color. I used pink yarn to sew all the shapes together so it might look like there is an extra round but there are only two rounds in each of the shapes. I used the pink yarn to sew the shapes together so that it would be easier to see an outline of each shape when explaining how to join the shapes.