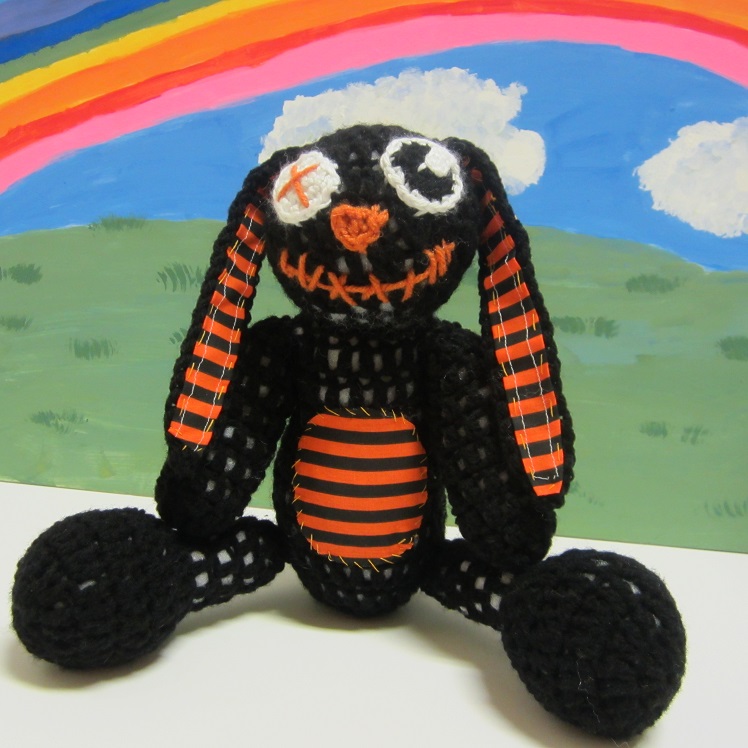
Goth Bunny Pattern
I use a size K (6.50 MM) hook unless otherwise specified and Red Heart Super Saver medium yarn.
* I have added the pattern for both the straight arms and the arms with ball ends so that you can choose which one you prefer!
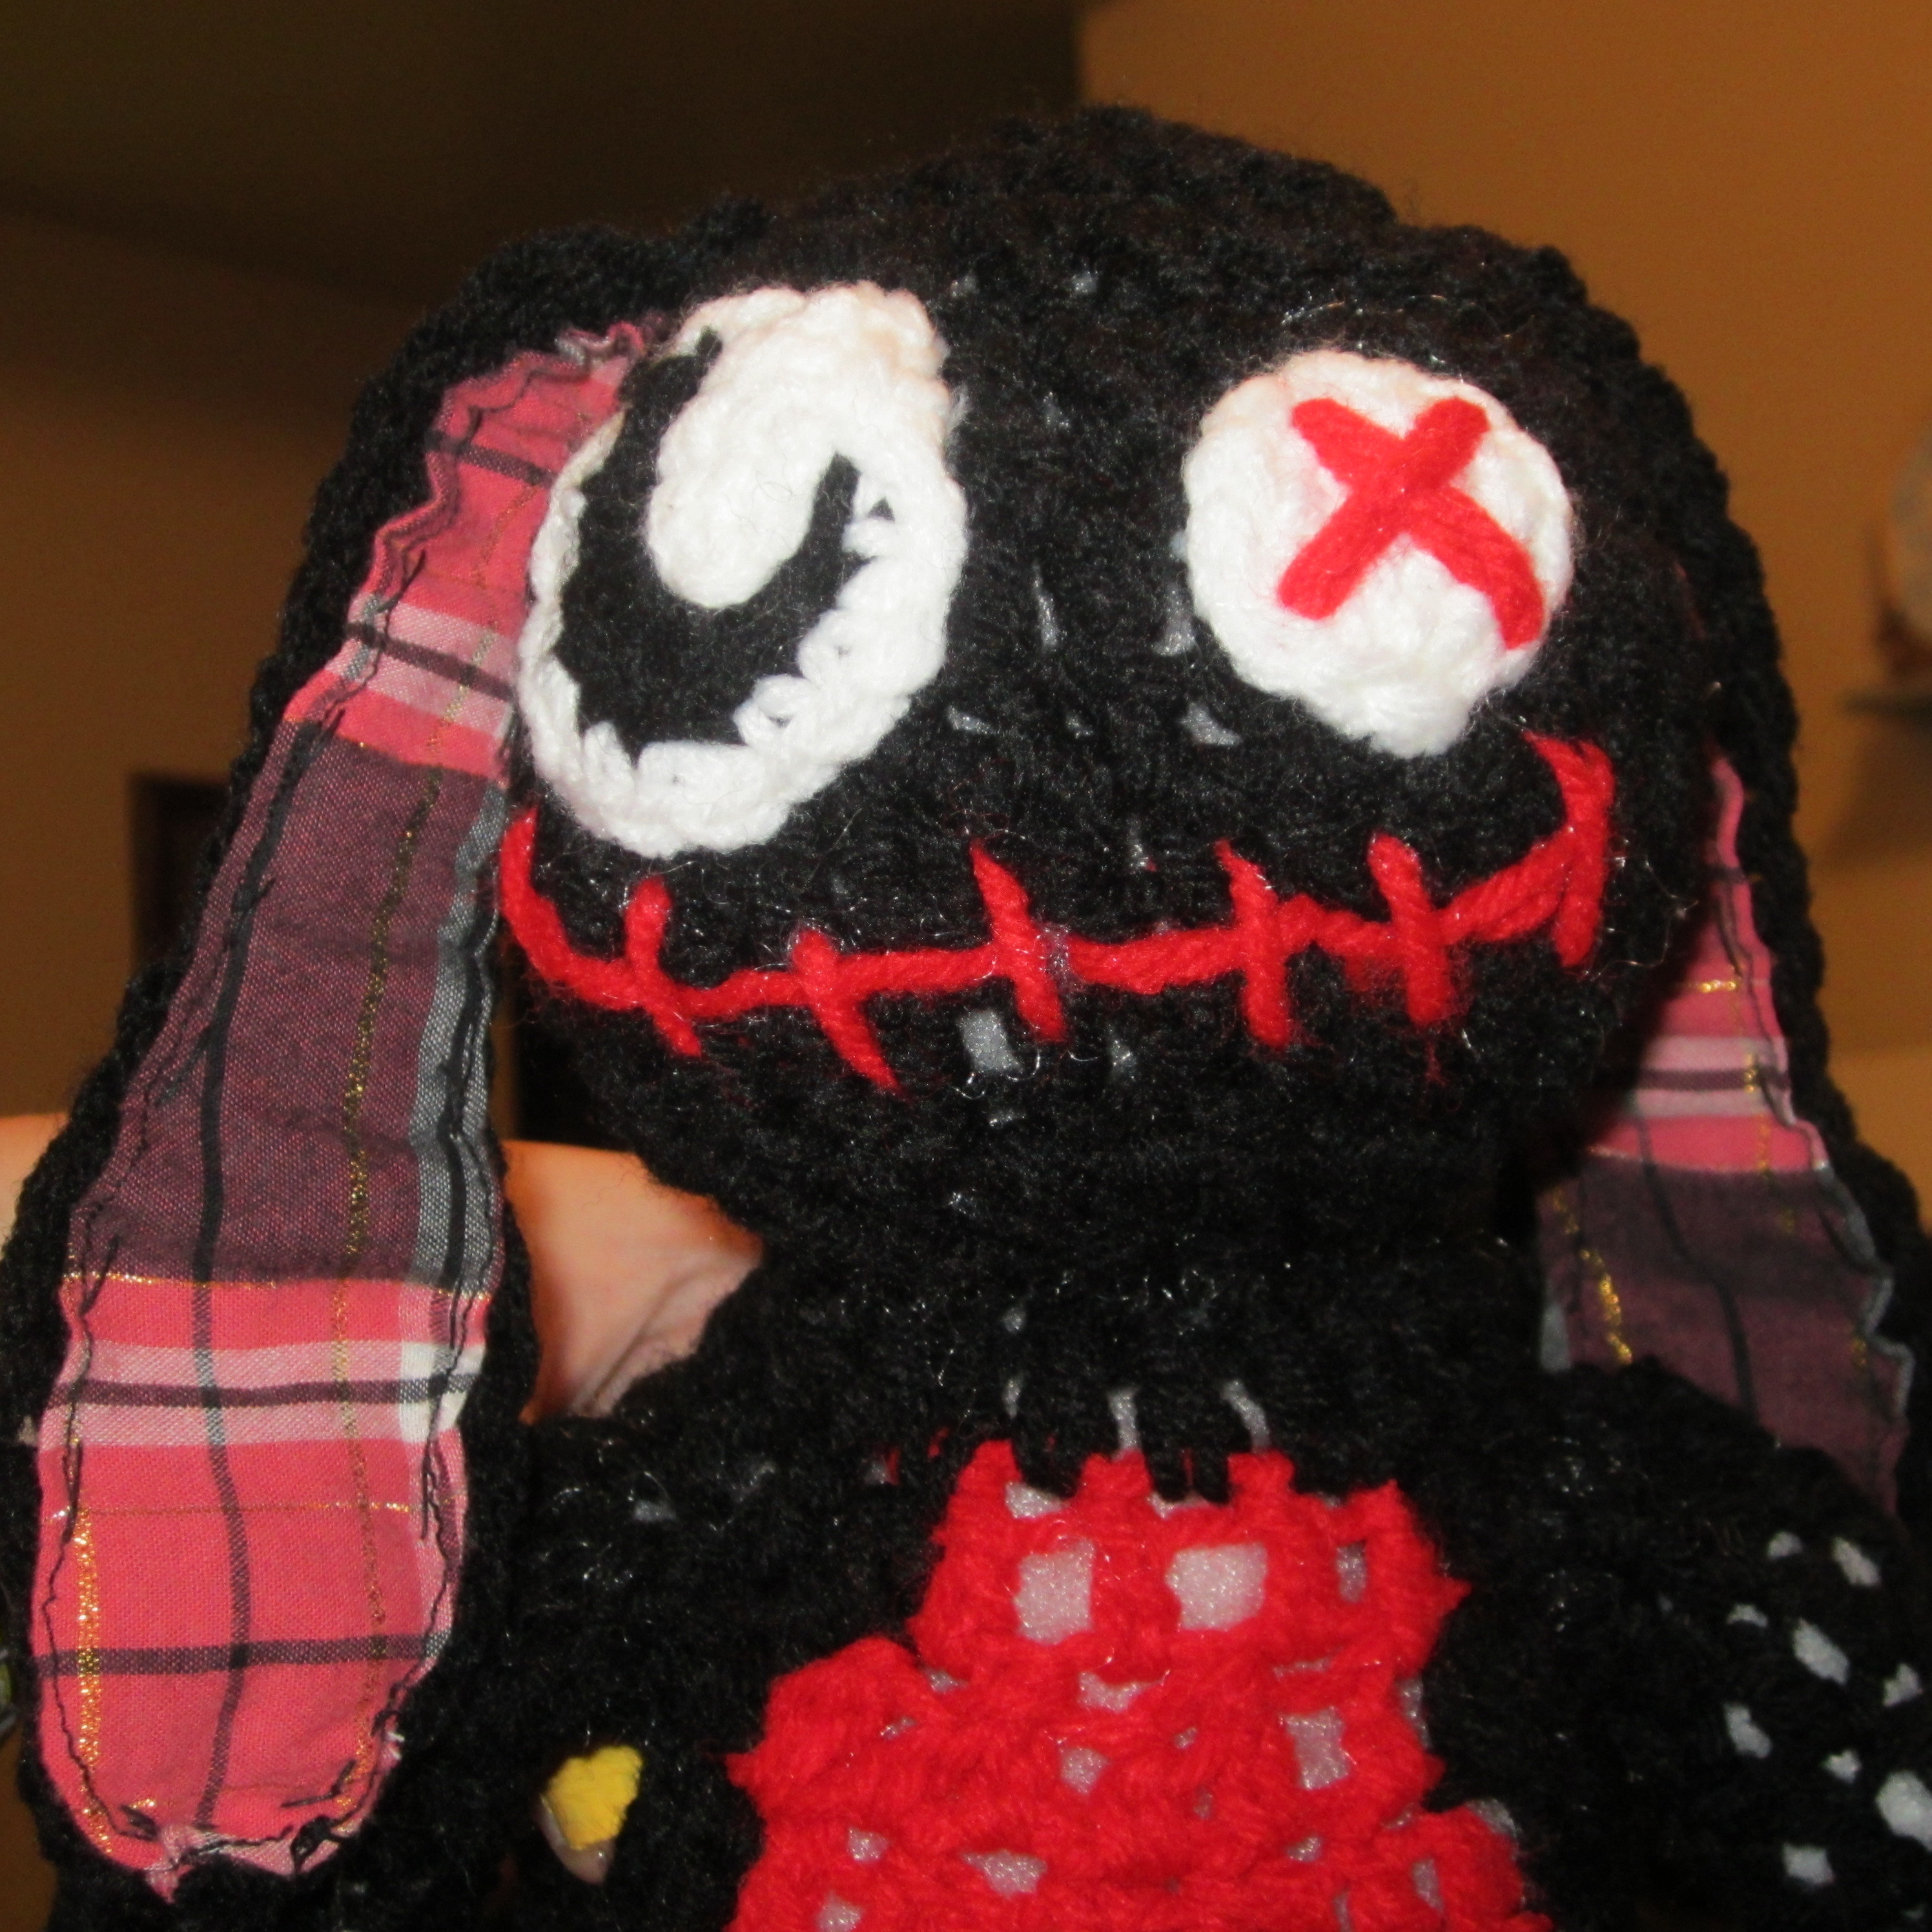
* I have also included the pattern for both the large anime-type eye and the ‘X’ eye. I like to make one of each, but feel free to use whatever combination you like!
————————————————————————————————–
Pattern:
Body:
Rnd 1: With color A, Ch 3, dc 8 in 3rd chain from hook, jn in first dc with sl st. (8 dc not including first ch-3)
Rnd 2: Ch 2, 2 dc in same st, 2 dc in each st around. Jn with sl st in first dc. (16 dc not including first ch-2)
Rnd 3: Ch 2, dc in same st, 2 dc in next st, (dc in next st, 2 dc in next st) around. Jn with sl st in first dc. (24 dc not including first ch-2)
Rnd 4-8: Ch 2, dc in same st and around. Jn with sl st in first dc. (24 dc not including first ch-2)
Rnd 9: Ch 2, dc in same st, dec, (dc, dec) around. Jn with sl st in first dc.
Rnd 10-12: Ch 2, dc in same st and around. Jn with a sl st in first dc. (17 dc in each rnd.) Fasten off after round 12.
Head:
Rnd 1: With color A, Ch 3, dc 8 in 3rd chain from hook, jn in first dc with sl st. (8 dc not including first ch-3)
Rnd 2: Ch 2, 2 dc in same st, 2 dc in each st around. Jn with sl st in first dc. (16 dc not including first ch-2)
Rnd 3: Ch 2, dc in same st, 2 dc in next st, (dc in next st, 2 dc in next st) around. Jn with sl st in first dc. (24 dc not including first ch-2)
Rnd 4: Ch 2, dc in same st and next st, 2 dc in next st, (dc, dc, 2dc), around. Jn with sl st in first dc. (32 dc not including first ch-2)
Rnd 5: Ch 2, dc in next st and around. Jn with sl st in top of first dc. (32 dc including first ch-2)
Rnd 6: Ch 2, dc in same st and next st, dc dec. (dc, dc, dec) around. Jn with sl st in first dc. (24 dc not including first ch-2 and counting the decreases as one st)
Rnd 7: Ch 2, dc in same st, dec in next st, (dc, dec) around. (16 dc not including first ch-2 and counting the decreases as one st.)
Rnd 8: Ch 2, dec around beginning with the same st as first ch-2. As in, you’ll be putting the first half of the first dec in the same st as the first ch-2. Jn with a sl st in first dc. (8 dc not including first ch-2 and counting the dc decreases as one dc.)
Stuff head and close the sphere by single crochet-decreasing around and then slip stitching across the small opening a few times. Fasten off leaving a tail long enough to sew head to body. I usually sew on eyes and nose before closing the head so it’s easier to weave the ends inside the head, but do whatever you’re most comfortable with to find the right placement.
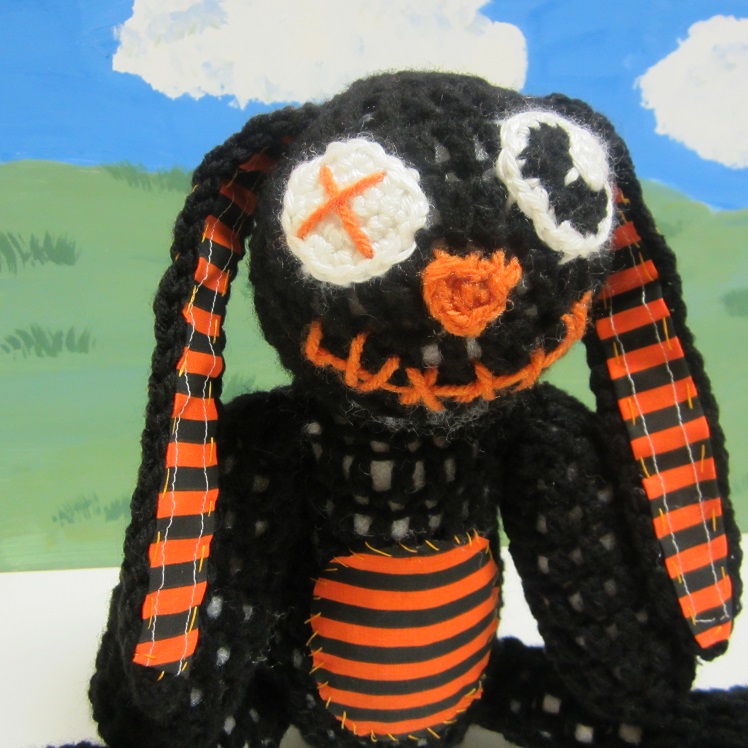
Cute eyes:
Use F (3.75 MM) hook.
Rnd 1: With black, Ch 2, 6 sc in 2nd ch from hook. Do not join. (6 sc)
Rnd 2: 2 sc in each st around. Jn with sl st in first sc. Fasten off. (12 sc)
Rnd 3: With white and working in back loops only, join with a sl st in any sc. Ch 1, 2 sc in same st as join, sc in back loop of next st, (2 sc in the back loop of next st, 1 sc in back loop of next st) around. Join with a sl st in 1st sc. (18 sc) For pupil, you will now chain 4 and sc in 2nd chain from hook and next 2 ch. Sl st in front loop of next st. Fasten off with tail long enought to sew pupil to eye and the eye to head. Fold strip down into the black of the eye and sew it into place.
‘X’ eye:
Use F (3.75 MM) hook.
Rnd 1: With white, Ch 2, 6 sc in 2nd ch from hook. Do not join. (6 sc)
Rnd 2: 2 sc in each st around. Jn with sl st in first sc. Fasten off leaving a tail long enough to sew eye to head. (12 sc)
When you attach eye to head, use desired color yarn to add an X shape over top of the white circle.
Triangle Nose:
Feel free to leave the nose off or to create one of your own by stitching around when you add the mouth later, but if you’d like a good ol’ triangle bunny nose, here’s the pattern I use.
With F (3.75MM) hook:
Ch 4, sc in 2nd ch from hook, dc in next ch, sc in last ch. Ch 1, sl st in same ch as last sc. Fasten off leaving tail long enough to stitch nose to head.
Bunny Ears (make two):
(Back to the K hook)
The ears are made by making one long chain, then working up the chain and back down the opposite side:
Ear: Ch 25. Sl st in 2nd ch from hook, sc in next ch, dc in next chain and the rest of the chains stopping before the very last chain. In the last chain, (dc, ch 2, sl st), and then pivot the ear so that you’ll be working back in the opposite direction along the ear. Now chain 2, and dc in the same chain as you just worked the sl st in. Now dc in the next ch and in each chain back down the ear until you reach the last 2 chains, (the ones where you made the first sl st and sc), and you will mirror those by adding a sc in the next ch and a sl st in the very last chain. Now to create a little more of a point at the end of the ear, ch 2 and join with a sl st in the very first sl st you made to start the ear. Fasten off and weave in ends.
If you’d like now, you can use the ear to trace a shape in your desired fabric to use for the inside center of the ear. Trace the ear and then sew a 1/4″ seam along the fabric ear. Sew fabric to inside of ear. I use a sewing machine to stitch the seam along the fabric, and then I hand stitch the fabric to the crochet-ear. You don’t have to make it perfect. The charm of a zombie-type doll is how patchy, messy, and fun it’s allowed to be!
*Note: If you don’t have a sewing machine and you’re wanting to save time, just trace the ear on the fabric and then cut it about 1/4″ smaller, just the inside of the line you traced, then stitch the ear directly to the bunny. Like I said, it’s okay if Bunny looks a little jagged or frayed. It’ll add to the charm.

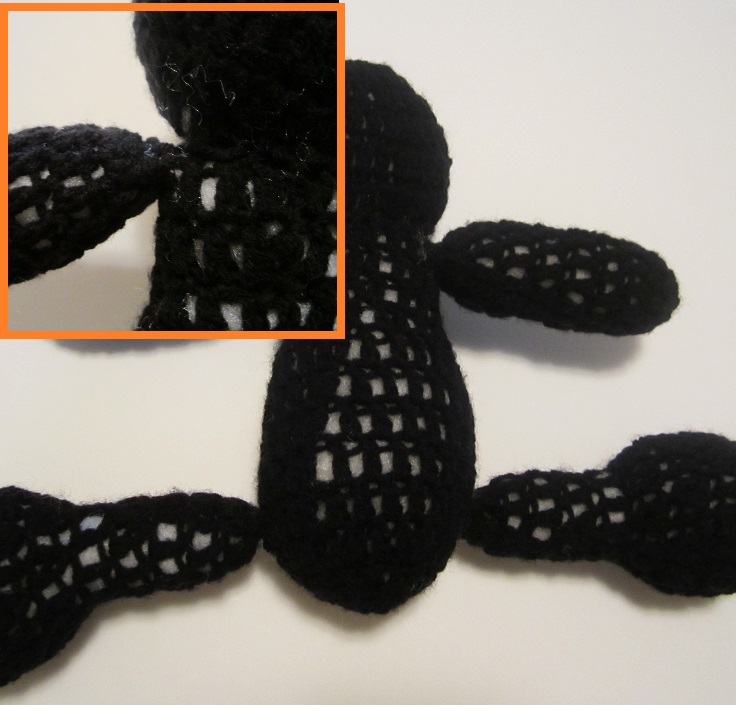
Legs with ball ends (Make two):
Rnd 1: Ch 3, 8 dc in 1st chain. Jn with sl st in 1st dc. (8 dc not counting 1st chains.)
Rnd 2: Ch 2, 2 dc in same st and in each st around. Jn with sl st in 1st dc. (16 dc not counting 1st ch-2.)
Rnd 3: Ch 2, dc in same st, 2 dc in next st, (dc, 2dc) around. Jn with sl st in 1st dc. (24 dc not including 1st ch-2.)
Rnd 4: Ch 2, dc in next st and around. Jn with sl st in 1st dc. (24 dc including 1st ch-2.)
Rnd 5: Ch 2, dc in same st, dec in next st, (dc, dec) around. (16 dc not including 1st dc and counting each dec as one dc.)
Rnd 6: Ch 2, dec around. Jn with sl st in 1st dc. (8 dc not including 1st ch-2)
Rnd 7-11: Ch 2, dc in same st and around. Jn with sl st in 1st dc. (8 dc not including 1st ch 2.) Fasten off after round 11 leaving tail long enough to sew legs to body.
Straight Arms without ball ends:
(Make two.)
Rnd 1: With black, ch 3, 8 dc in 3rd ch from hook. Jn with a sl st in first dc. (8 dc.)
Rnd 2: Ch 2, dc in same st, dc, 2dc, (dc, dc, 2dc) twice. Jn with a sl st in first dc. (12 dc not including first ch-2.)
Rnd 3-9: Ch 2, dc in same st and around. Jn with sl st in 1st dc. (12 dc not including first ch-2.) Fasten off leaving a tail long enough to sew arms to body.
Arms with Ball Ends:
(Make Two)
Rnd 1: Ch 3, 8 dc in 1st chain. Jn with sl st in 1st dc. (8 dc not counting 1st chains.)
Rnd 2: Ch 2, 2 dc in same st and in each st around. Jn with sl st in 1st dc. (16 dc not counting 1st ch-2.)
Rnd 3: Ch 2, dc in same st and in each st around. Jn with sl st in 1st dc. (16 dc not counting 1st ch-2.)
Rnd 4: Ch 2, beginning in same st as first ch-2, dc dec around. Jn with sl st in 1st dc. (8 dc not counting first ch-2.)
Rnd 5-10: Ch 2, dc in same st, dc in each st around. Jn with sl st in 1st dc. (8 dc not counting 1st ch-2.) Fasten off leaving tail long enough to sew arm to body.
Finishing:
Stuff and close head and sew eyes, nose and stitch mouth onto head in whichever order you are most comfortable with. Weave in the loose ends as you go.
*Note: When attaching the arms and legs, I like to pinch the open ends closed and sew them that way and THEN attach them to the body so that the limbs are more floppy. If you’d like a more stiff look then you can stuff the limbs to the very tip-top and stitch them to the body in a circle rather than in a straight line like you’ll do in they’re pinched closed.
Sew head, arms, and legs to body, stuffing the body, arms, and legs as you go.
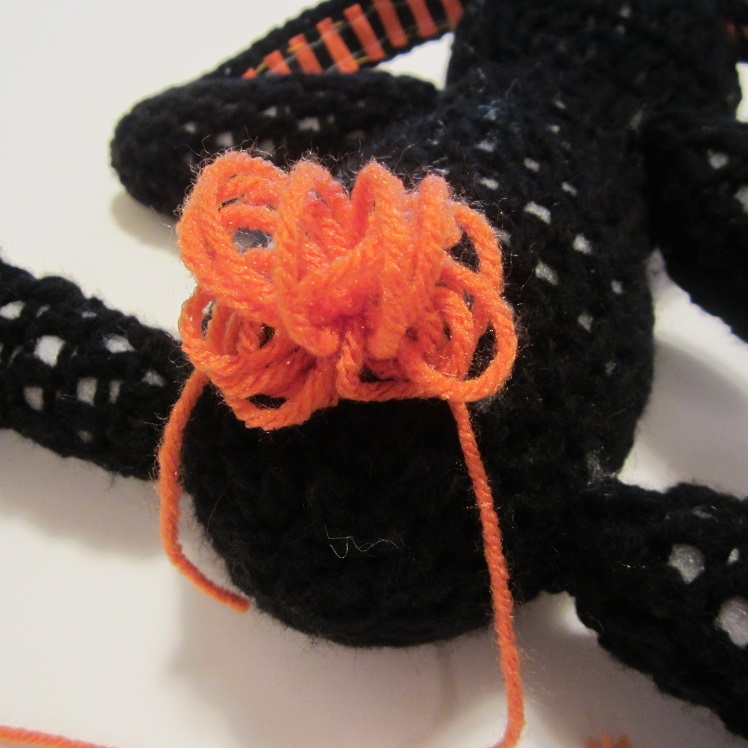
Make and attach Tail and Tummy pieces, as described below.
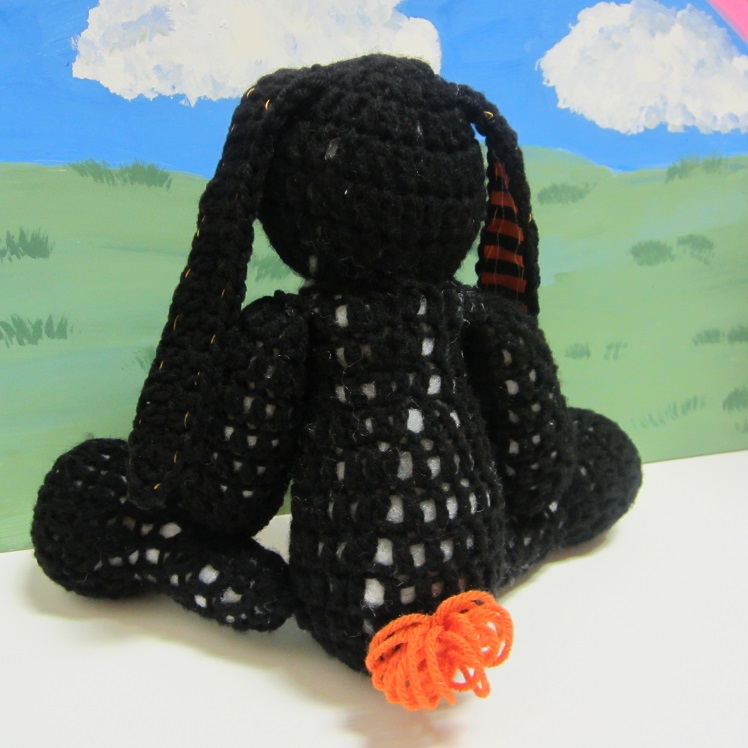
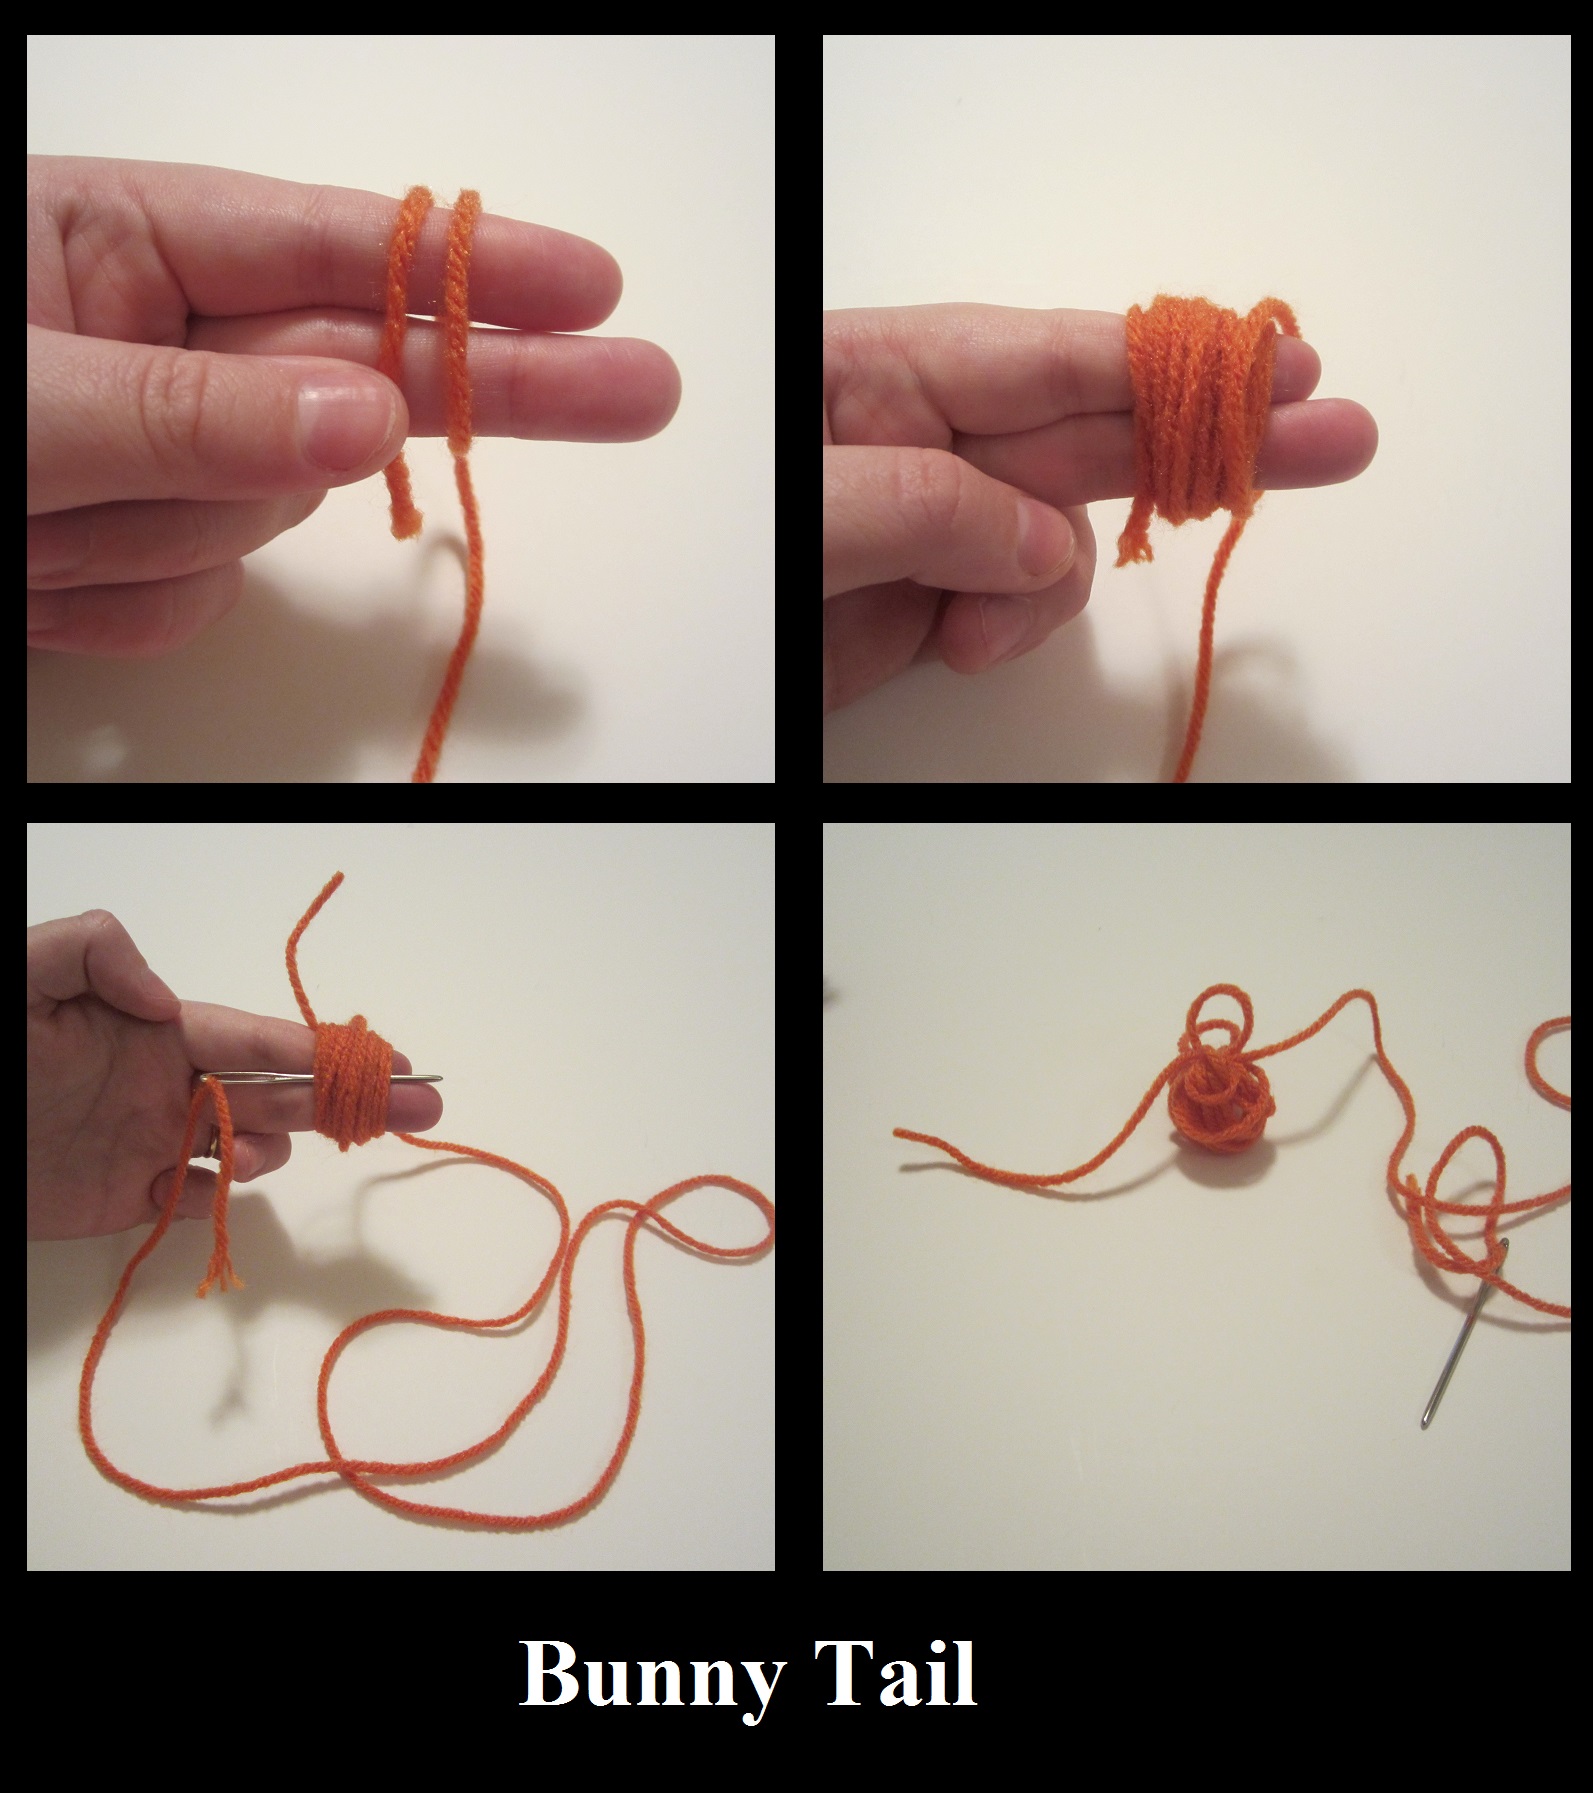
Tail:
Wrap yarn around two fingers about 20 times, then thread the end of the yarn through the opposite side of the spirals so that you’ll be able to tie the beginning and the end of the yarn together over the top of all the loops to secure them. Make the tail end of your yarn long enough to sew the tail to the body.
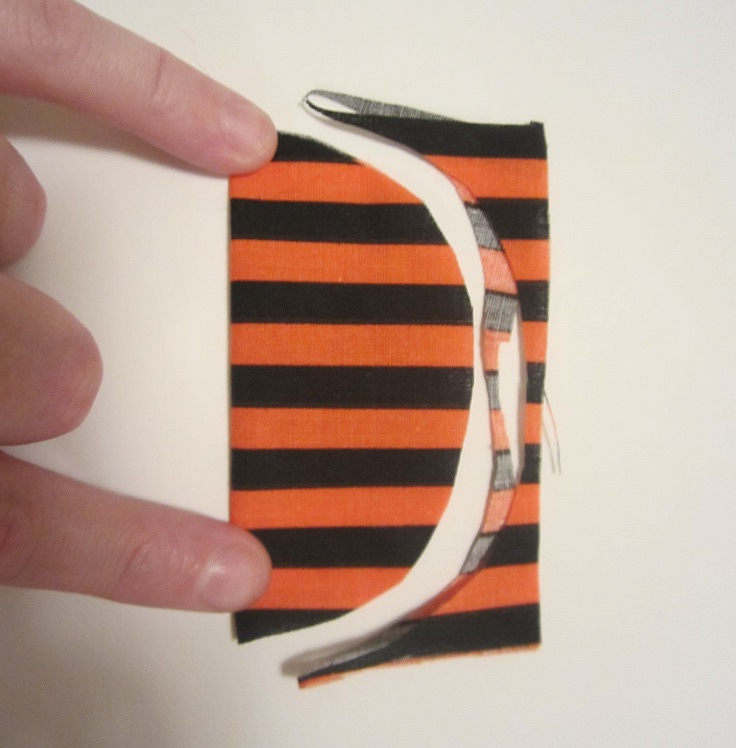
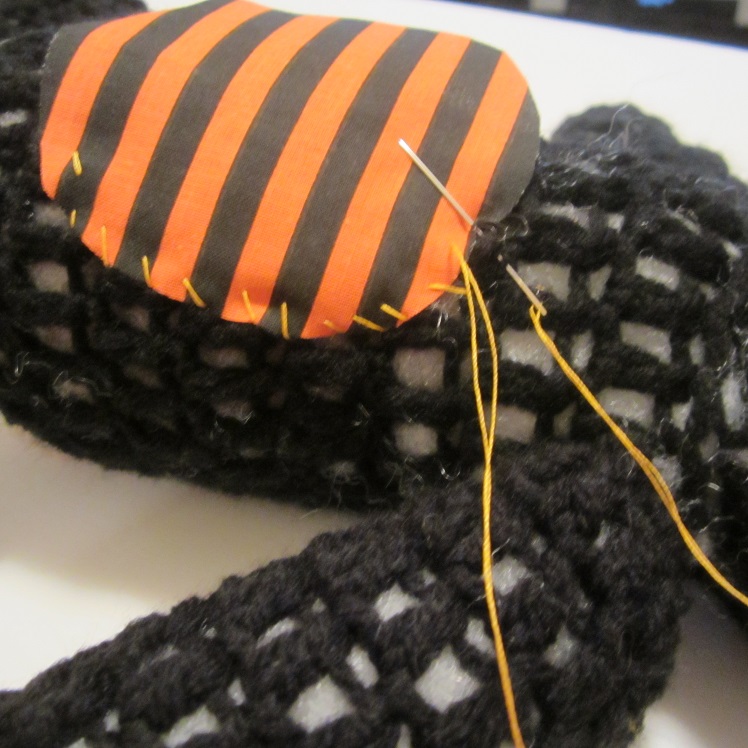
Tummy:
Cut a 3″ by 3″ square from the desired fabric. Fold in half and cut a half-circle shape taking up as much of the fabric square as you can. Stitch the circle in place on the bunny’s stomach.
Now just tuck in any loose ends, tighten anything needing tightened, and stuff the stuffing back in where sewing things together might have pulled some of it to the surface so that it looks nice and tidy! Commence cuddling! Or…um…talking the neighbor kid into wearing a white gown and standing at their window holding Bunny with a blank expression and too-much bluish make-up around her eyes to make them look sunken…and then when your best friend comes over, point at the neighbor’s house and scream. Or, you know…whatever else you and Goth Bunny can think of to do to pass the time. Just be safe! 🙂