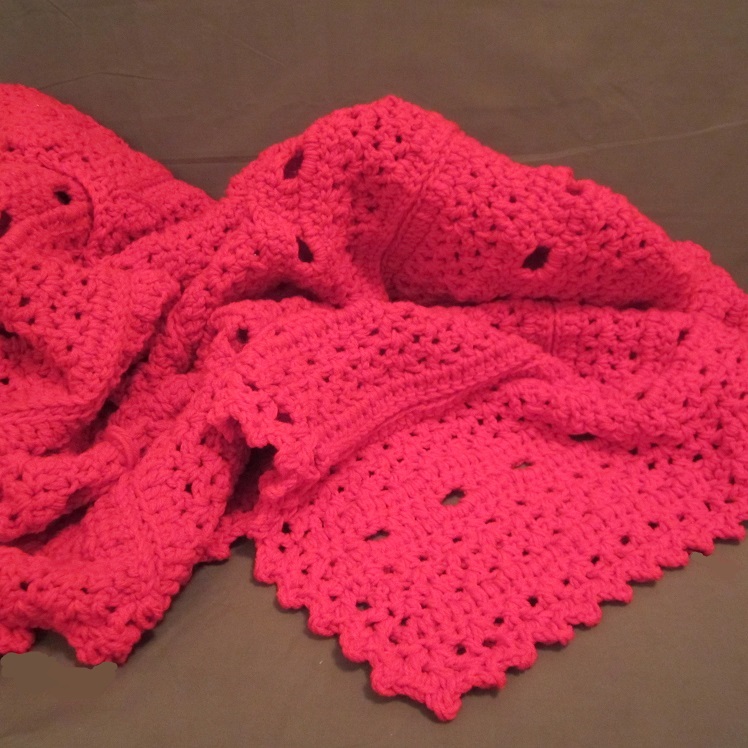
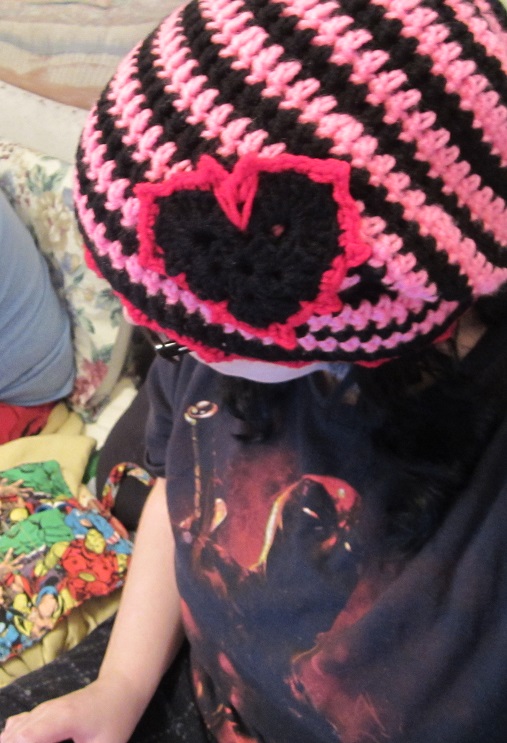
This is my actual hat on my favorite mannequin head, but I colored in the face and hair to give her a more anime look.
*A note before getting started for experienced crocheters and/or designers: I use the same basic construction to make any kind of square lined hat. I’ll go into further detail below, but to sum it up quickly for other pattern designers eager to put their own twist to this: First I create squares and sew them side-by-side until the strip is wide enough to fit my head nicely. Then I join my yarn on each side of the joined square strip and I add a single stitch round on each side as a border for the squares. For the crown, I make a circle with each round getting progressively larger at an even rate until the hate is as wide as the head I’m creating it for is. After that I switch to making single stitch rounds until the crown is long enough so that when I attach it to the square strip I already created it is the right length. When I want a slouchy beanie, I repeat the single stitch rounds several times to make the hat longer. (If you want an elf type hat, you can also add single stitch rounds to the earlier rounds I describe below instead of waiting until you get to the single stitch rounds to repeat it for length.) This is the basics of how I design all my hats. When I don’t have a square strip to add to the hat, I simply keep going when I repeat the single stitch rounds after making the crown.

________________________________________________________
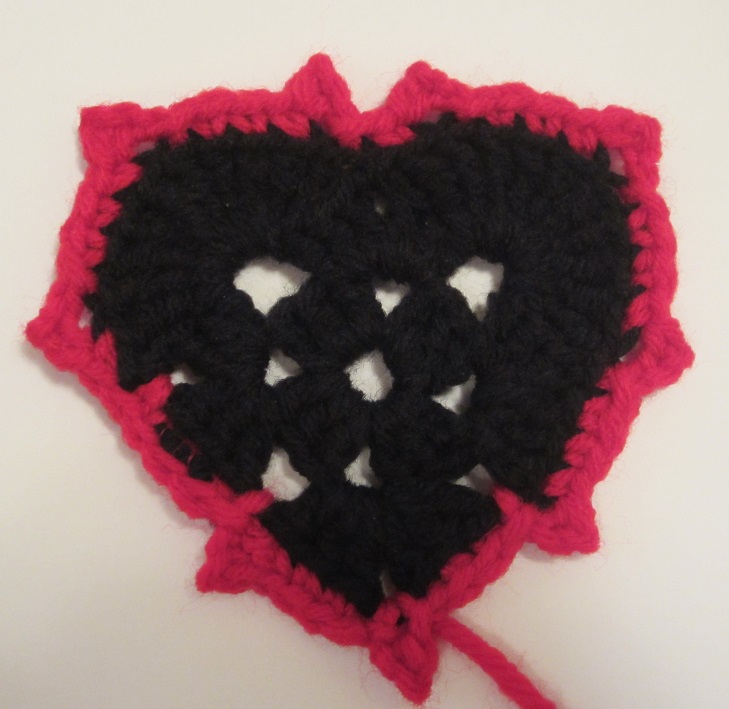
Pattern for Head Over Heels Granny Heart Hat

I use an F hook, a K hook, a yarn needle, and Red Heart Super Saver Yarn. My heart squares are 3 inches by 3 inches, and my head is 22 inches around. The Craftyghoul hat model I made is about the same as my head, so the hat fits me exactly like it fits this model. I’m an average size adult chick.
Granny Heart Square:
I used an F hook and Red Heart Super Saver Yarn. These hearts would also make cute blankets or used in the construction of kazillions of other things! My heart squares are 3 inches by 3 inches.
Rnd 1: With heart color: Ch 4, jn with a sl st in first ch to form a ring. Ch 1, (sc, ch 2) into ring 4 times. Jn with a sl st in first sc.
Rnd 2: Sl st to ch-2 space, (5dc, ch 1) in sc, sl st into next ch-2 space, ch 1, (5dc, ch 1) into next sc, sc into ch-2 space, ch 2, sk the sc stitch, dc into ch-2 space, ch 2, sk the sc stitch, sc in ch-2 space right before the sc where you added your first 5dc, (it might be hard to see is my I specify, but once you get the stitch in there it divideds the shape nicely), ch 1, jn with a sl st in first dc.Fasten off heart color.
Rnd 3: Jn background color in the back loop of the sc right after all the double crochets that have created both arches of the heart. Ch 2, (counts as first dc), 2dc into same back loop, ch 2, add another 3 dc into the same back loop. First corner created. Ch 1, and skip the corner ch-2 space altogether, sc in the back loop of the dc, ch 1, skip ch-2 space, (3dc, ch 2, 3dc) in the back loop of the sc, ch 1, sk first dc, (sc, hdc, dc) in back loop of next dc, ch 4, sk the next 3 dc, 3dc in the center corner where you sl stiched in Rnd 2 (basically you’re putting 3dc into that corner from Rnd 1), ch 4, sk next 3 dc, (dc, hdc, sc) in back loop of next dc, ch 1, jn with a sl st in first dc.
Rnd 4: Sl st to corner ch-2 space. Ch 2, (2dc, ch 2, 3dc, ch 1) into corner chain, sk next 3 dc, (3dc, ch 1) in center sc, sk next 3 dc, (3dc, ch 2, 3dc, ch 1) into corner chain, sk next 3 dc, (3dc, ch 1) into ch-1 space, sk next 3 sts, (3dc, ch 2, 3dc, ch 1) into corner, sk one dc, (3dc, ch 1) into the center dc, sk next dc, (3dc, ch 2, 3dc, ch 1) into corner chain, sk next 3 sts, (3dc, ch 1) in next ch-1 space. Jn with a sl st in first dc.
*Note: If the squares you choose are juuuust too short when you add them next to each other to go around your head, but too long if you add another square, just add a single or double crochet row or two to one of the ends of the strip to give it those few extra centimeters.
__________________________________________________________
For border:
For the border and the rest of the hat, I used a K hook and Red Heart Super Saver Yarn.
Jn with a sl st in the back loop of any stitch. Ch 2, working in back loops only around, dc in each stitch, skipping the ch-1 spaces. In each corner you will do a double crochet deacrease. So each square will have 9 dc stitches along it, and there will be one double crochet decrease stitch between each square to join them nice and snug. Jn with a sl st in first dc. Repeat this on the other side of the strip of squares.
For the second round along the bottom of the hat, continue to work in the back loops only if you want yours to look like mine, or you can work in the entire stitch if you prefer. Ch 1, hdc in same st, and in each st around. Jn with a sl st in first hdc.
______________________________________________
Crown of hat:
This is the same basic pattern I use for all of my hats. There is a repeating pattern to make each round a little wider, and when it gets to your specific preference for how wide, you then simply add double crochet rounds until the hat is as tall as you’d like it, either making it fit your head perfectly, or you can even add many more rounds to create a slouchy beanie! For a children’s hat, simply make less of the growing rounds before you start the repeating double crochet rounds.
Crown of the hat:
*Use a K hook and Red Heart Super Saver Yarn.
*On any rounds after I switch colors, I like to work in the back loops only of the round with the new color, but this isn’t necessary unless you also like the little ‘line’ that appears as a result as well. In this particular hat I used the same color on everything except the heart squares.
Rnd 1: Ch 4, join to form a ring. Ch 2, (counts as dc here and throughout pattern), 9dc in ring. Jn in first dc to close round here and at the end of each rnd. (10 dc)
Rnd 2: Ch 2, dc in same st, 2 dc in each st around. Join. (20 dc)
Rnd 3: Ch 2, 2 dc in next st, (dc, 2dc) around. Join. (30 dc)
Rnd 4: Ch 2, Dc in next st, 2 dc, (dc, dc, 2dc) around. Join. (40 dc)
Rnd 5: Ch 2, dc in next 2 sts, 2 dc, (dc, dc, dc, 2dc) around. Join. (50 dc)
Rnds 6: Ch 2, dc in next 3 sts, 2 dc, (dc, dc, dc, dc, 2dc) around. Join. (60 dc)
*Note: If you want the hat wider, you can add another round here of increasing before going on to Rnd 7. I stop at round six and rarely feel like I need to add around 7 at all, but sometimes the yarn or the size of squares I used will make me add another round or two. My head is about 22 inches around. You can continue the widening pattern with a round of: (dc in next 5 sts, 2dc in next st) around. If you are using a smaller hook and find that the hat isn’t even almost big enough, add another few rounds inthe same manner before continuing on to Rnd 7, which would look like this: (Dc in next 6 sts, 2 dc in next st) around. (Dc in next 7 sts, 2dc in next st) around… In the same way if the hat is getting too wide, you can stop at round 4 or 5 and skip straight to Rnd 7. That’s useful if you’re making a hat for a kiddo.
Rnd 7: Ch 2, dc in next st and around. Jn. Repeat this round until hat his desired length when you add the square strip of the hat) If you’re making a normal beanie, this will probably only be a round or two. I personally only add Rnd 7 and sometimes only one more round before I fasten off and leave a tail long enough to sew this crown to the bottom strip of squares. When I make a slouchy beanie, though, I add round 7 and then repeat Rnd 7 six or seven more times before fastening off and sewing the top to the bottom square strip.
* Sew the crown of the hat to the strip of squares with a yarn hook by weaving the needle in and out of the back (inside) loops. Fasten off and weave in ends.
This heart hat design was inspired by a Zelda heart necklace my hubby, Master Betty, got for me for Valentine’s Day! I put the necklace on my Craftyghoul model so you can see the it too!