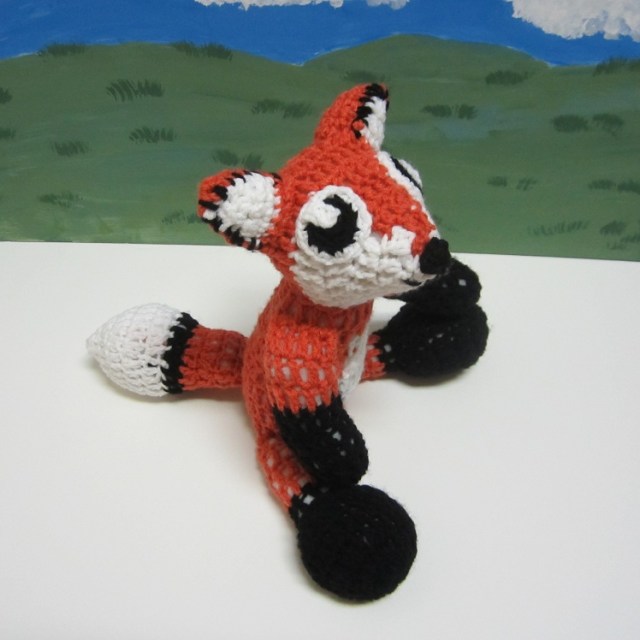
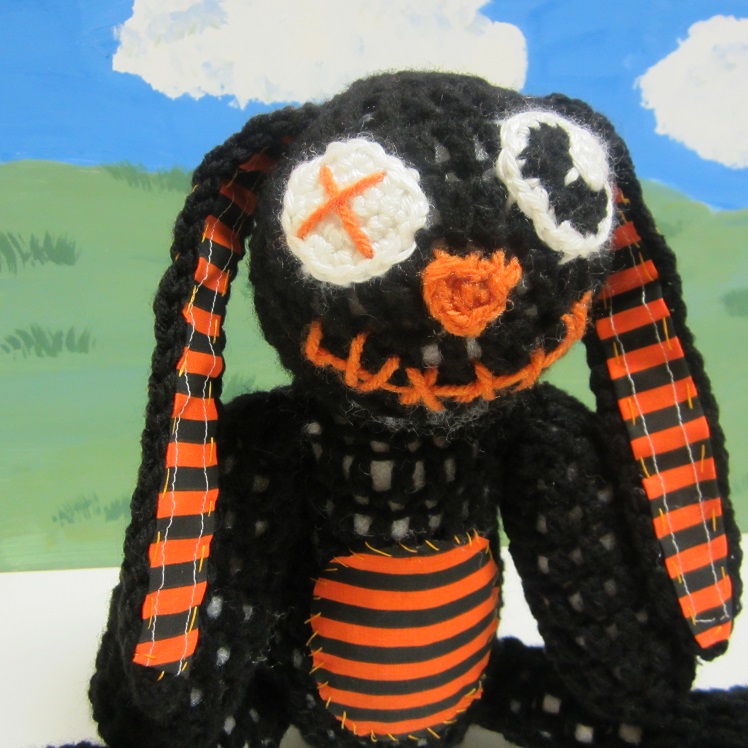
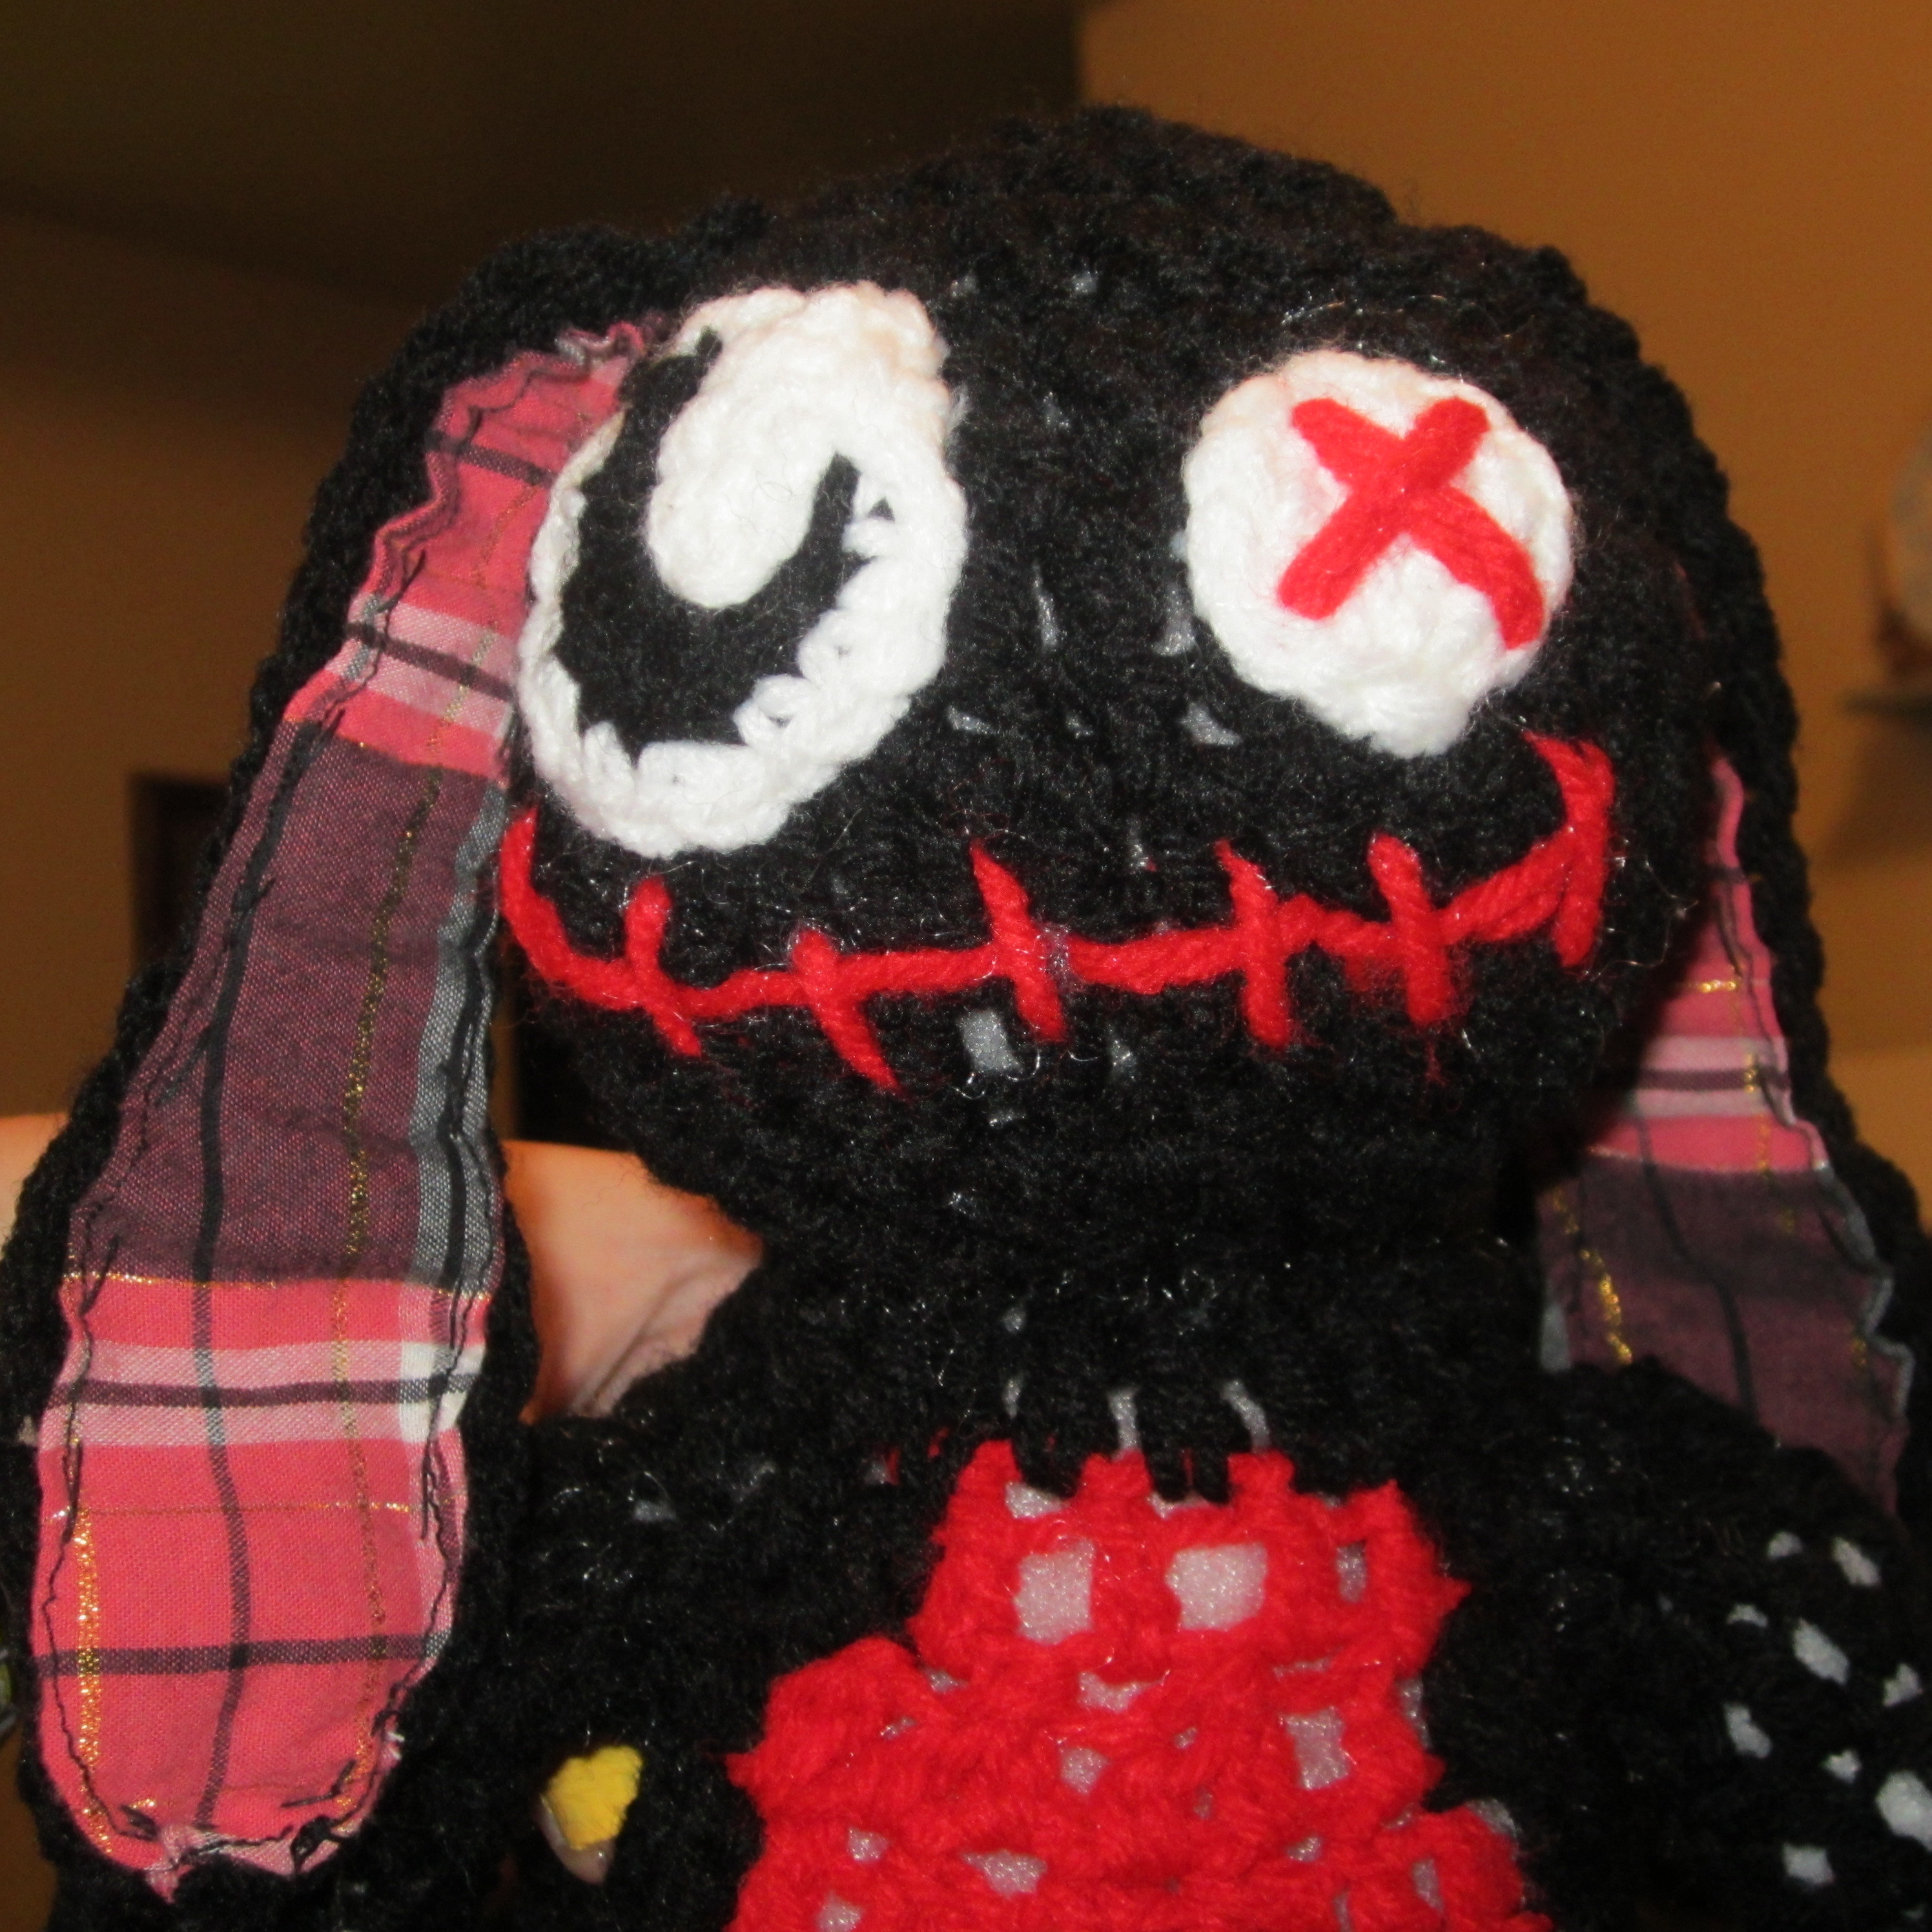
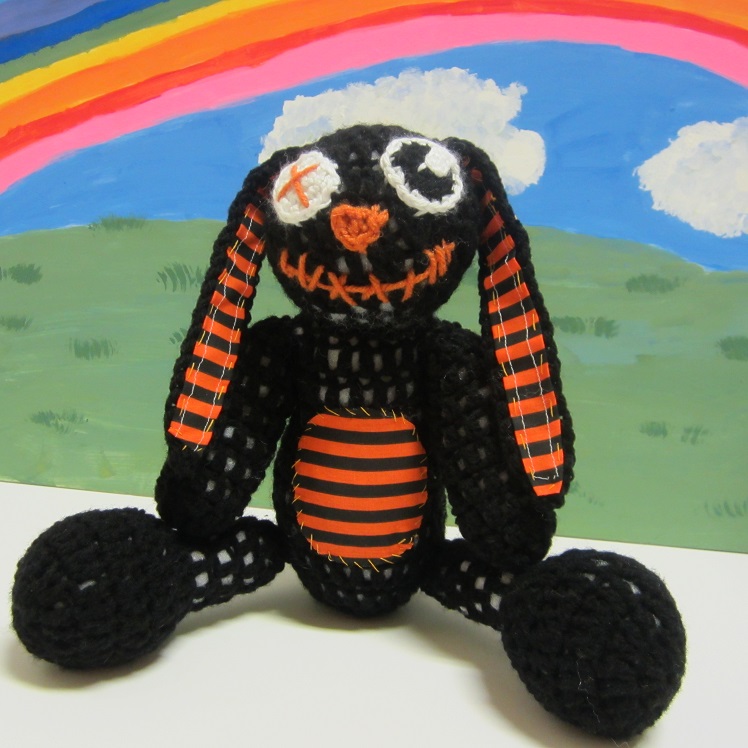
Fox Doll Crochet Pattern
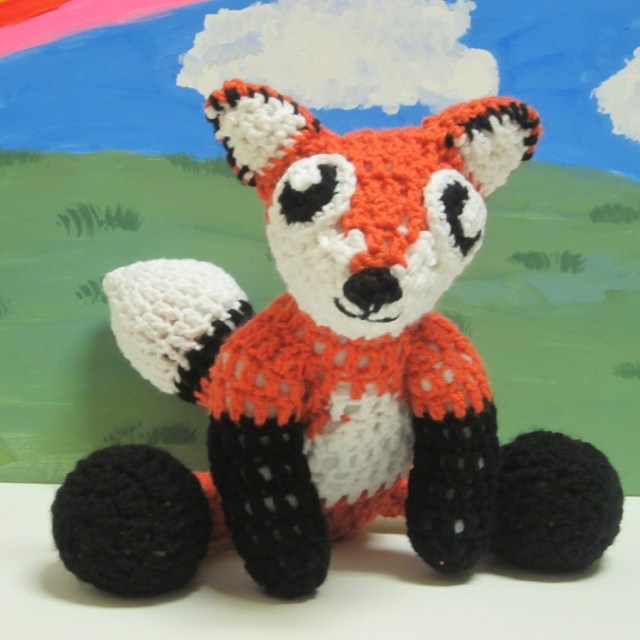
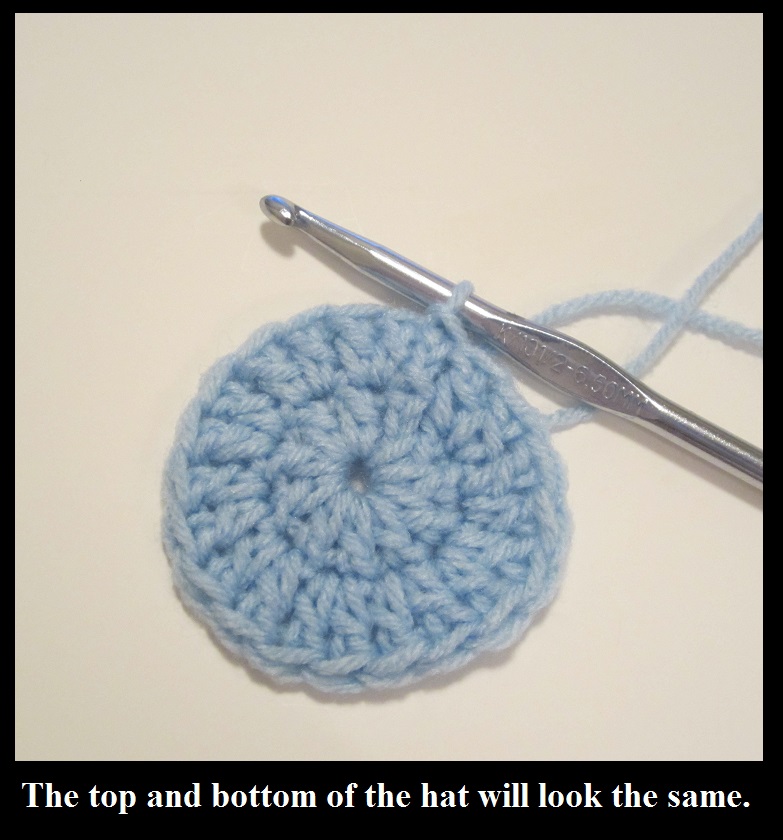
I use a size K (6.50 MM) hook for everything accept the eyes and nose. For those I use an F (3.75 MM) hook. I use Red Heart yarn when I make this fox doll.
Body:
Rnd 1: With color A, Ch 3, dc 8 in 3rd chain from hook, jn in first dc with sl st. (8 dc not including first ch-3)
Rnd 2: Ch 2, 2 dc in same st, 2 dc in each st around. Jn with sl st in first dc. (16 dc not including first ch-2)
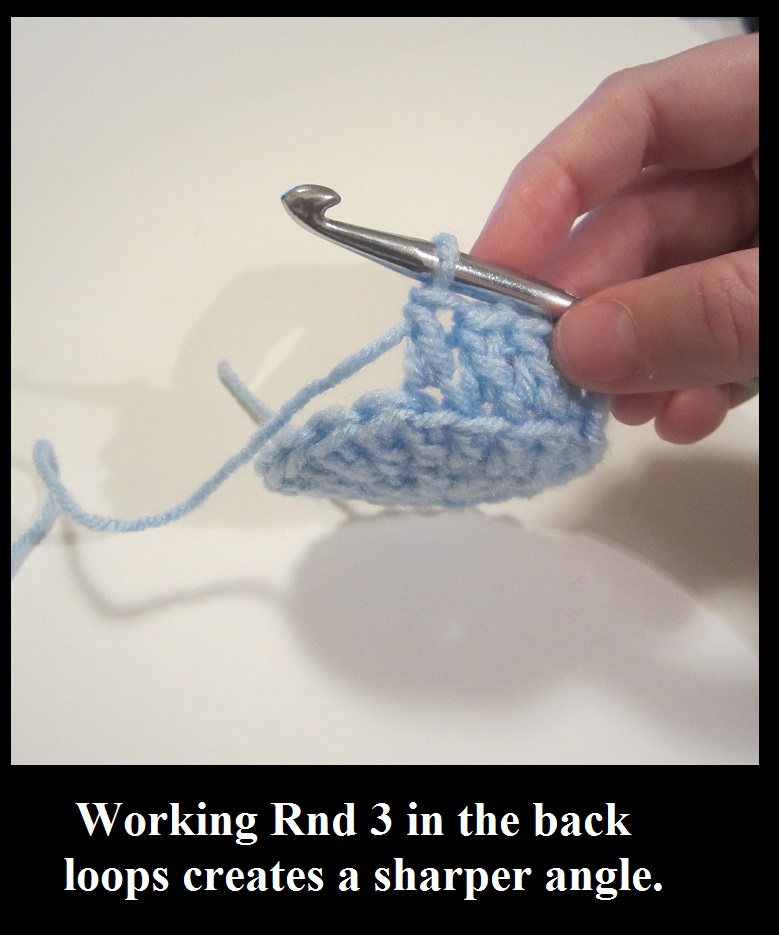
Rnd 3: Ch 2, dc in same st, 2 dc in next st, (dc in next st, 2 dc in next st) around. Jn with sl st in first dc. (24 dc not including first ch-2)
Rnd 4-5: Ch 2, dc in same st and around. Jn with sl st in first dc. (24 dc not including first ch-2)
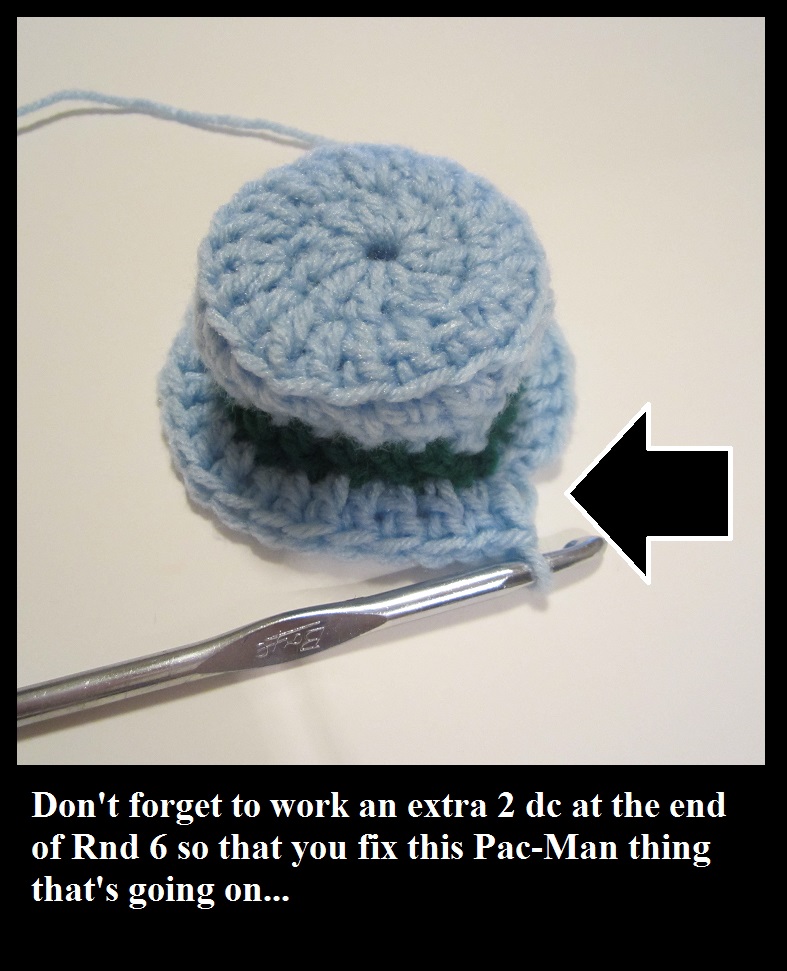
Rnd 6: Ch 2, dc in same st and in next 7 st. Do not fasten off, with color B, dc in the next 8 st, do not fasten off. With a seperate end of the yarn of color A, dc in the last 8 st. Jn wih a sl st. ( 24 dc not icluding first ch-2.)
Rnd 7-8: Ch 2, turn and work in opposite direction now. Dc in same st and in next 7 st, do not fasten off, but pick up color B where you left it and with color dc in next 8 st, do not fasten off, but pick up the very first strand of color A where you left it, and use that to dc in the last 8 st. Jn with sl st in first dc. (24 dc not including first ch-2)
Rnd 9: Ch 2, turn and work in opposite direction. Dc in same st, dec, dc, dec, dc, dec, dc, switch to color B, dec, dc, dec, switch to color A, dc, dec, dc, dec, dc, dec. Jn with sl st in first dc.
Rnd 10: You can now fasten off the other rows as you go and use the color A strand you have at the end of this row to finish off the body. Ch 2, turn and work in the opposite direction so that the right side is facing you. Dc in same st and in the next 6 st, (fasten off and change to color B) dc in the next 3 st, (fasten off and change to color A for the last time), dc in the last 7 st. Jn with a sl st in first dc.
Rnd 11-12: Ch 2, dc in next st and around. Jn with a sl st in first dc. (17 dc including first ch-2.) Fasten off.
Head:
Rnd 1: With white, ch 2, 6 sc in 2nd ch from hook. Jn with a sl st in first sc. (6 sc.)
Rnd 2: Ch 1, sc in same st and next 4 st. Switch to orange and sc in last st. Jn with a sl st in first sc. (6 sc.)
Rnd 3: Still using orange, Ch 1, turn work and put 2 sc in same st as ch-1. Switch to white and work 2 sc in each of the stitches left around. Jn with a sl st in first sc. (12 sc total.)
Rnd 4: Ch 2, turn. Dc in same st and in next 9 st. Switch to orange and dc in the last 2 st. Jn with a sl st in the first dc. (The orange should be lining up to form the top of the nose.) (12 dc total.)
Rnd 5: Still using orange, Ch 2 and turn work. Dc in same st, 2 dc in next st, dc in next st. Switch to white. (2 dc, dc) around to the end. Jn with a sl st in first dc. (18 dc total not including first ch-2.)
Rnd 6: Still using white, ch 2 and turn. Dc in same st and next st, 2 dc in next st, (dc, dc, 2dc) 3 times. Dc in the next 2 st, then switch to orange and work 2 dc in the next st, dc, dc, 2dc. Jn with a sl st in first dc. (24 dc total not including first ch-2.)
Rnd 7: Ch 2, turn. Dc in same st and next 2 st, 2dc, dc, dc, dc. Switch to white. 2dc in next st, (dc, dc, dc, 2dc) around to end. Jn with a sl st in first dc. (30 dc not including first ch-2.)
Rnd 8: Fasten off with the white and jn orance with a sl st in any st. Ch 2, dc in same st and around. Jn with a sl st in first dc. (30 dc not including first ch-2.)
Rnd 9: Ch 2, dc in same st and next st, (decrease, dc, dc) around. Jn with a sl st in first dc. (23 dc not including first ch-2.)
Rnd 10: Ch 2, dc in same st, decrease, (dc, dec) around. Jn with a sl st in first dc. (16 dc not including first ch-2.)
Rnd 11: Ch 2, double crochet decrease around. Jn with a sl st in first dc. Stuff the head and sl st to close. I usually sew on eyes and nose before closing the head so it’s easier to weave the ends inside the head.
Cute eyes:
Use F (3.75 MM) hook for the eyes.
(Make two.)
Rnd 1: With black, Ch 2, 6 sc in 2nd ch from hook. Do not join. (6 sc)
Rnd 2: 2 sc in each st around. Jn with sl st in first sc. Fasten off. (12 sc)
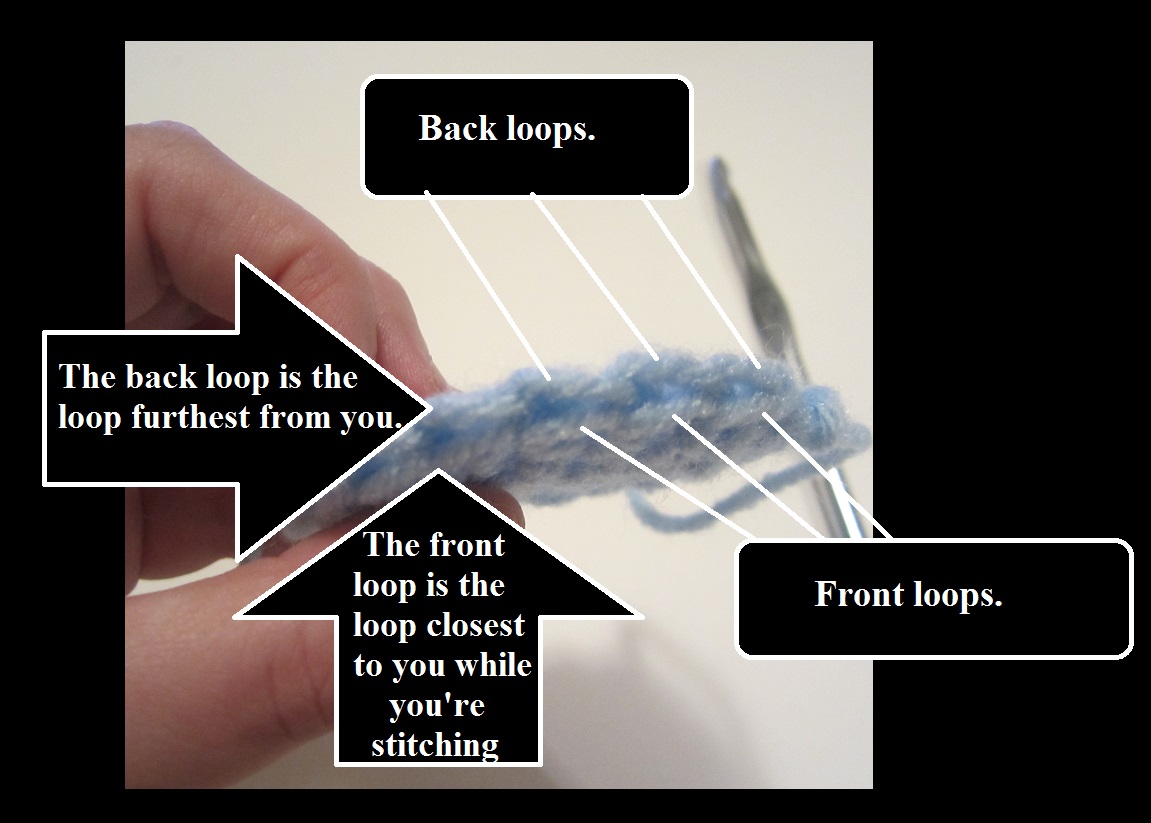
Rnd 3: With white and working in back loops only, join with a sl st in any sc. Ch 1, 2 sc in same st as join, sc in back loop of next st, (2 sc in the back loop of next st, 1 sc in back loop of next st) around. Join with a sl st in 1st sc. (18 sc) For pupil, you will now chain 4 and sc in 2nd chain from hook and next 2 ch. Sl st in front loop of next st. Fasten off with tail long enought to sew pupil to eye and the eye to head. Fold strip down into the black of the eye and sew it into place.
Nose:
Use an F (3.75 MM) hook for the nose.
Ch 4, sc in 2nd ch from hook, dc in next ch, sc in last ch. Ch 1, sl st in same ch as last sc. Fasten off leaving tail long enough to stitch nose to head.
Arms:
(Make two.)
Rnd 1: With black, ch 3, 8 dc in 3rd ch from hook. Jn with a sl st in first dc. (8 dc.)
Rnd 2: Ch 2, dc in same st, dc, 2dc, dc, dc, 2dc, dc, 2dc. Jn with a sl st in first dc. (12 dc not including first ch-2.)
Rnd 3-6: Ch 2, dc in same st and around. Jn with sl st in 1st dc. (12 dc not including first ch-2.) Fasten off.
Rnd 7- 9: With orange, Jn with a sl st in any of the stitches of Rnd 6 and then begin to repeat Rnd 3 times.
Legs:
(Make two.)
Rnd 1: Ch 3, 8 dc in 1st chain. Jn with sl st in 1st dc. (8 dc not counting 1st chains.)
Rnd 2: Ch 2, 2 dc in same st and in each st around. Jn with sl st in 1st dc. (16 dc not counting 1st ch-2.)
Rnd 3: Ch 2, dc in same st, 2 dc in next st, (dc, 2dc) around. Jn with sl st in 1st dc. (24 dc not including 1st ch-2.)
Rnd 4: Ch 2, dc in next st and around. Jn with sl st in 1st dc. (24 dc including 1st ch-2.)
Rnd 5: Ch 2, dc in same st, dec in next st, (dc, dec) around. (16 dc not including 1st dc and counting each dec as one dc.)
Rnd 6: Ch 2, dec around. Jn with sl st in 1st dc. (8 dc not including 1st ch-2)
Rnd 7: Ch 2, dc in same st and around. Jn with sl st in 1st dc. (8 dc not including 1st ch-2.) Fasten off from black yarn and join orange yarn with a sl st in the same st as your last join on this rnd.
Rnd 8-11: Ch 2, dc in same st and around. Jn with sl st in 1st dc. (8 dc not including 1st ch 2.)
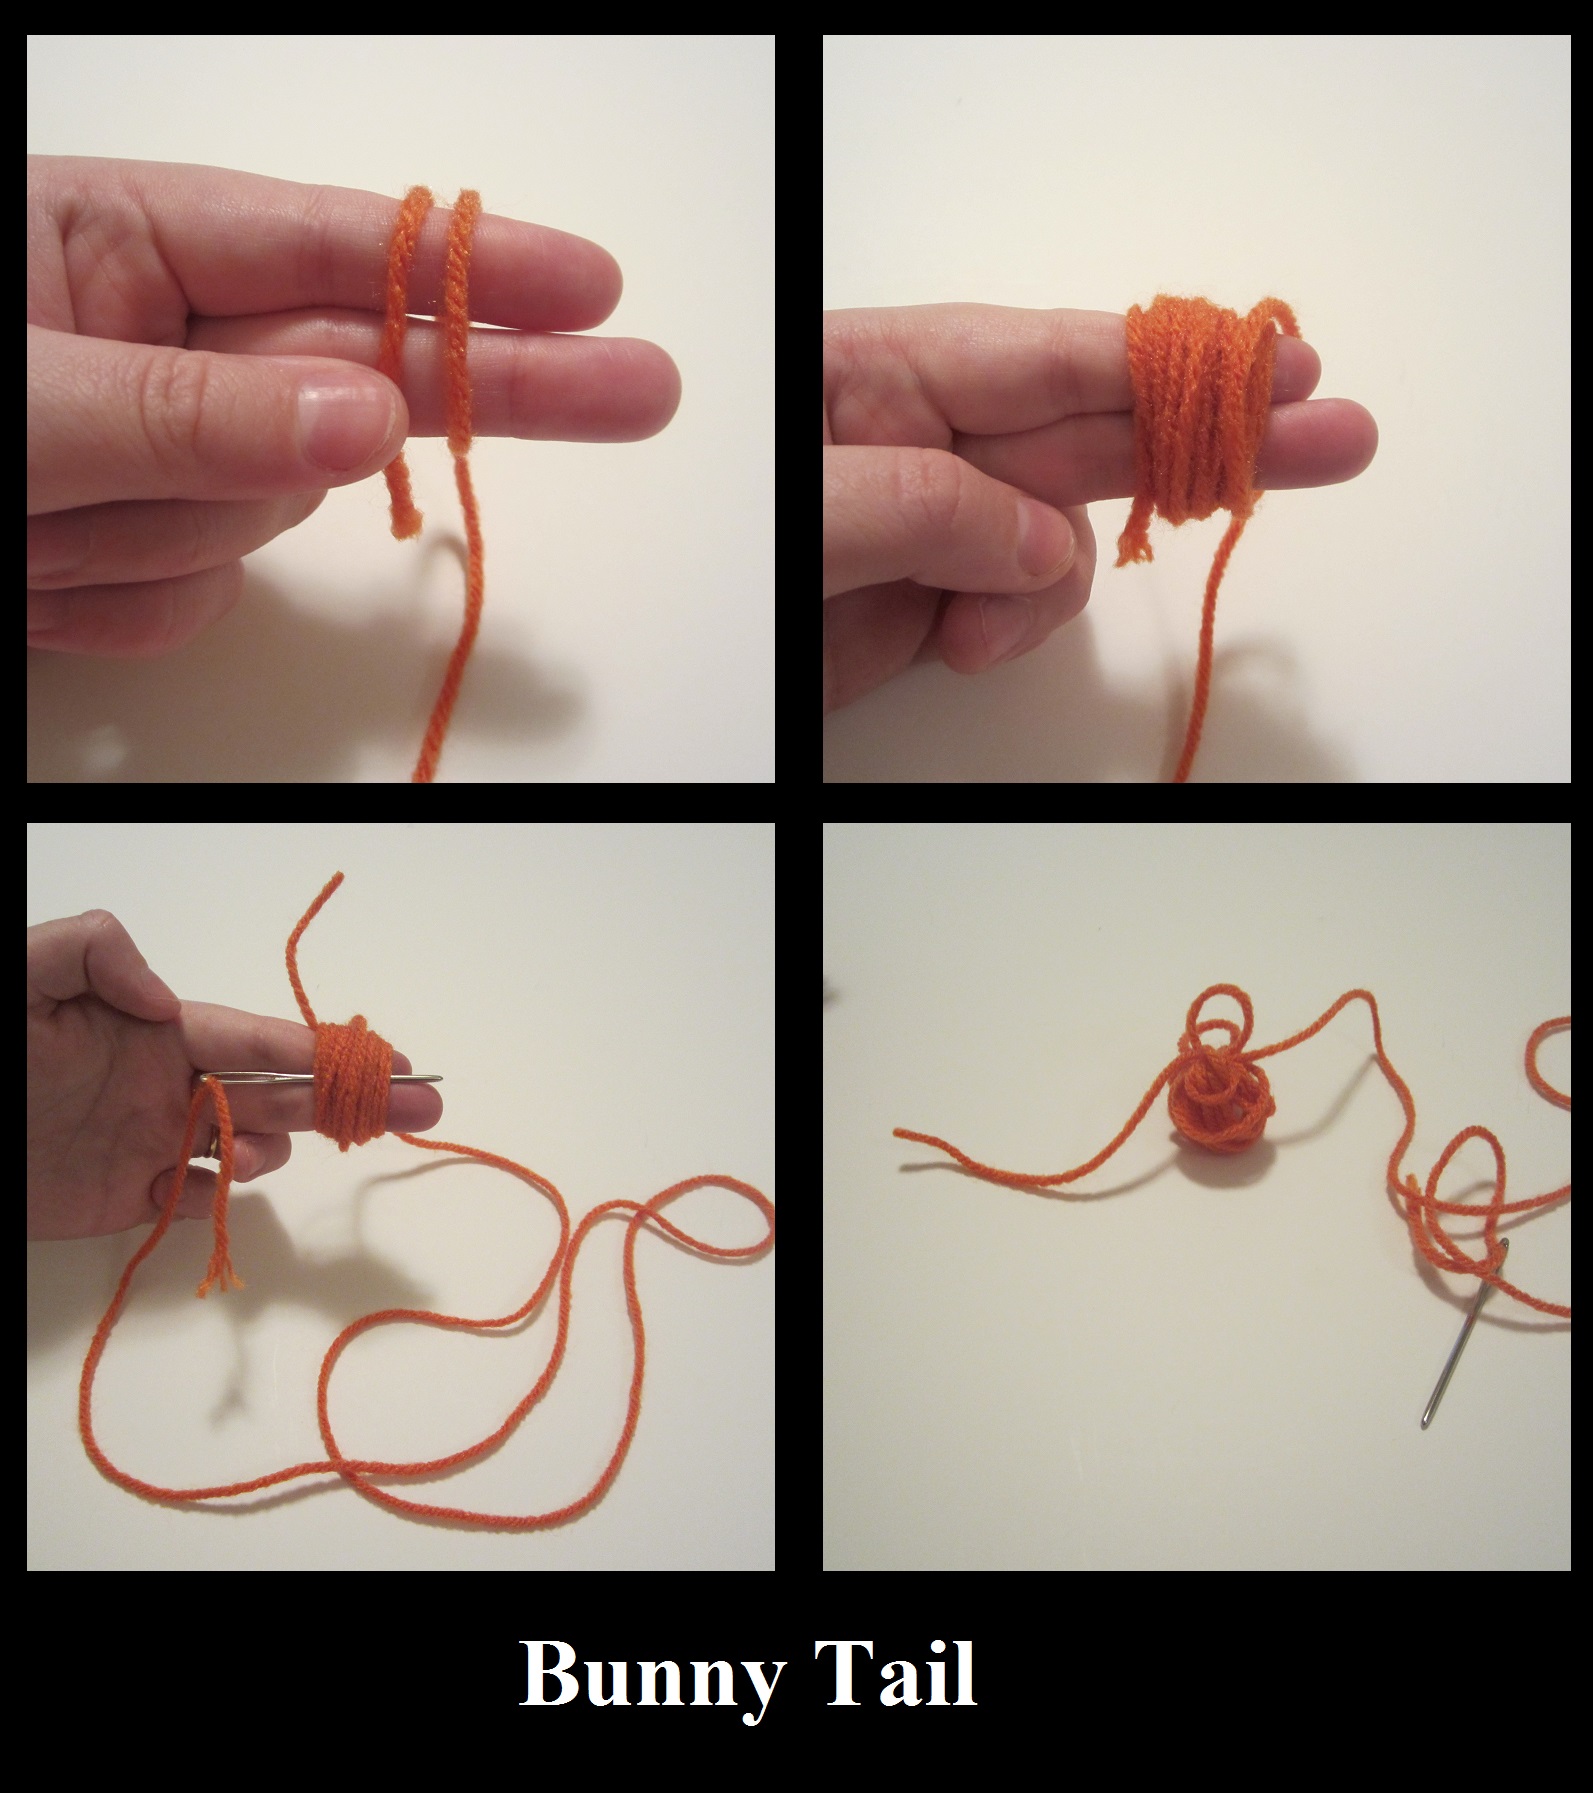
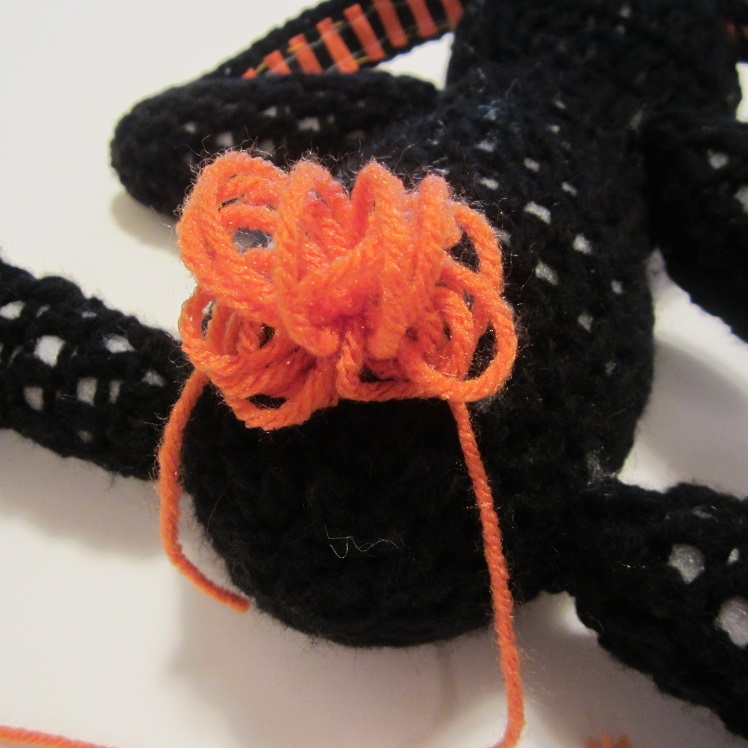
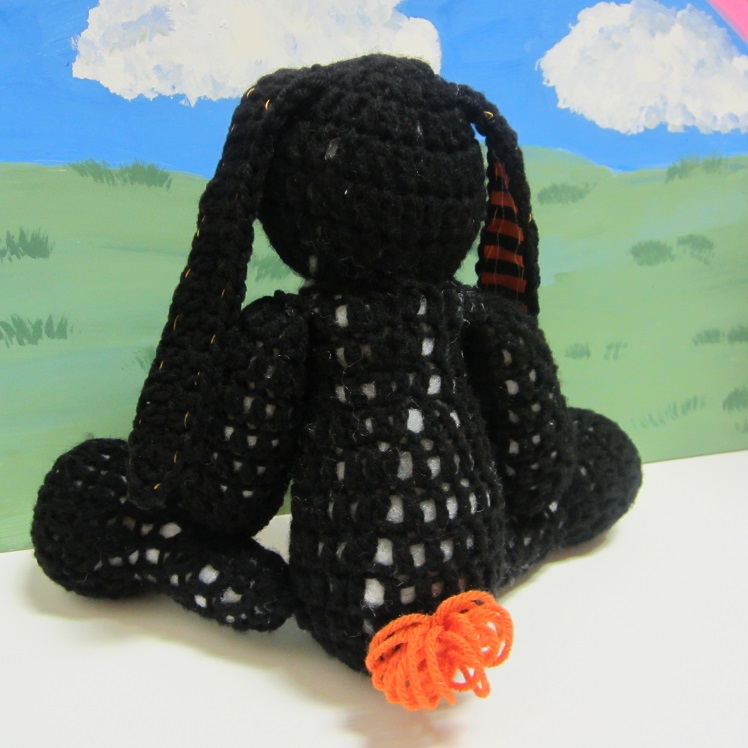
Tail:
Rnd 1: With white, ch 3, 4 dc in 3rd ch from hook. Jn with a sl st in first st. (4 dc.)
Rnd 2: Ch 2, 2dc in same st and in each st around. Jn with a sl st in first st. (8 dc not including first ch-2.)
Rnd 3: Repeat Rnd 2. (You should have 16 dc at the end of the rnd now.)
Rnd 4: Ch 2, dc in same st, 2dc in next st, (dc, 2dc) around. Jn with a sl st in first dc. (24 dc not including first ch-2.)
Rnd 5: Ch 2, dc in same st and around. Jn with sl st in first dc. (24 dc not including first ch-2.)
Rnd 6: Ch 2, dc in same st, decrease once, (dc, descrease) around. Jn with a sl st in first dc. (16 dc not including first ch-2.)
Rnd 7: With black, ch 2, dc in same st, decrease once, (dc, decrease) around, dc in each of the last 2 st. Jn with a sl st in first dc. (12 dc not including first ch-2.)
Rnd 8-10: With orange, ch 2, dc in same st and around. Jn with sl st in first dc. (12 dc in each row not including first ch-2.)
Rnd 11: Ch 2, double crochet decrease around. Jn with a sl st in first dc. (6 dc not including the first ch-2.) Stuff tail.
Rnd 12: Ch 2, double crochet decrease around. Jn with a sl st in first dc. (3 dc not including the first ch-2.) Finish stuffing and sew tail closed.
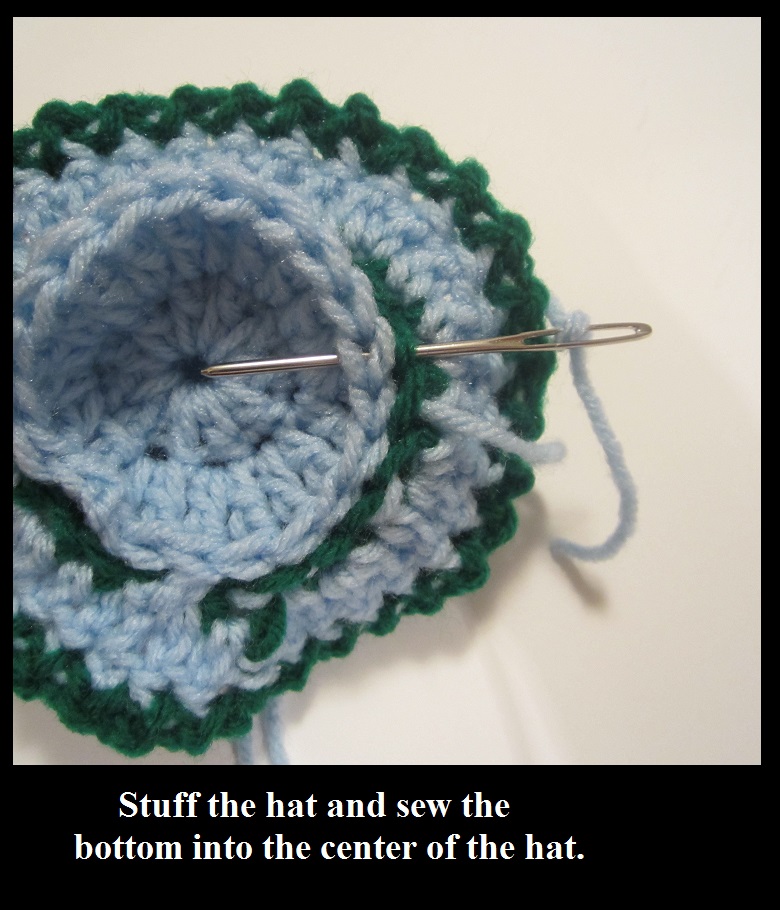
Stuff arms and legs and close them the same as the tail. Sew the arms, legs, tail, and head to body.
Ears:
(Make two.)
Back of ear:
Row 1: With orange, ch 5, sc in 2nd ch from hook, dc, sc, sl st in the last ch. Turn. (4 st.)
Row 2: Sc in 1st 3 st, 2 sc in the last st. Turn. (5 sc.)
Row 3: Sc in 1st 4 st, 2 sc in the last st. Turn. (6 sc.)
Row 4: Sc in 1st 5 st, 2 sc in the last st. Turn. (7 sc.)
Row 5: Sc in 1st 6 st, 2 sc in the last st. Turn. (8 sc.)
Row 6: Sc in 1st 7 st, 2 sc in the last st. Turn. (9 sc.)
Row 7: Sc in 1st 8 st, 2 sc in the last st. Turn. (10 sc.) Fasten off and weave in ends.
Front of ear:
Row 1: Using white, ch 7, sc in 2nd ch from hook and across. Turn. (6 sc.)
Row 2: Decrease, sc in the next 2 st, decrease. Turn. ( 4 sc.)
Row 3: Sc across. Turn. (4 sc.)
Row 4: Decrease twice. Turn. (2 sc.)
Row 5: Sc across. (2 sc.) Fasten off and weave in ends.
Sew front of ear to back using black yarn.
Bottom of ear:
Work in continous rounds without joining.
Rnd 1: Ch 2, 4 sc in 2nd ch from hook. (4 sc.)
Rnd 2: (2sc, sc) twice. (6 sc.)
Rnd 3: (2sc, sc, sc) twice. (8 sc.)
Rnd 4: (sc, dc) in 1st st, dc in next st, sc in next 2 st, (sc, dc) in next st, dc in next st, (sc, sl st) in next st. Fasten off leaving tail long enough to sew ear to head.
Attach bottom of ear to the top front/back of ear while stuffing the ear. Sew ears to head.