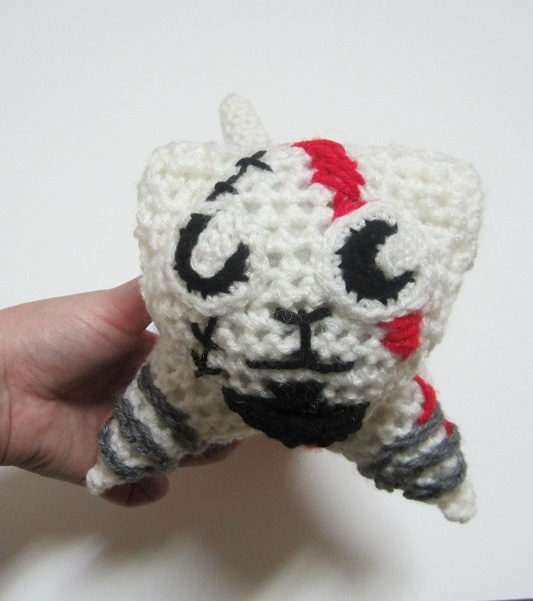
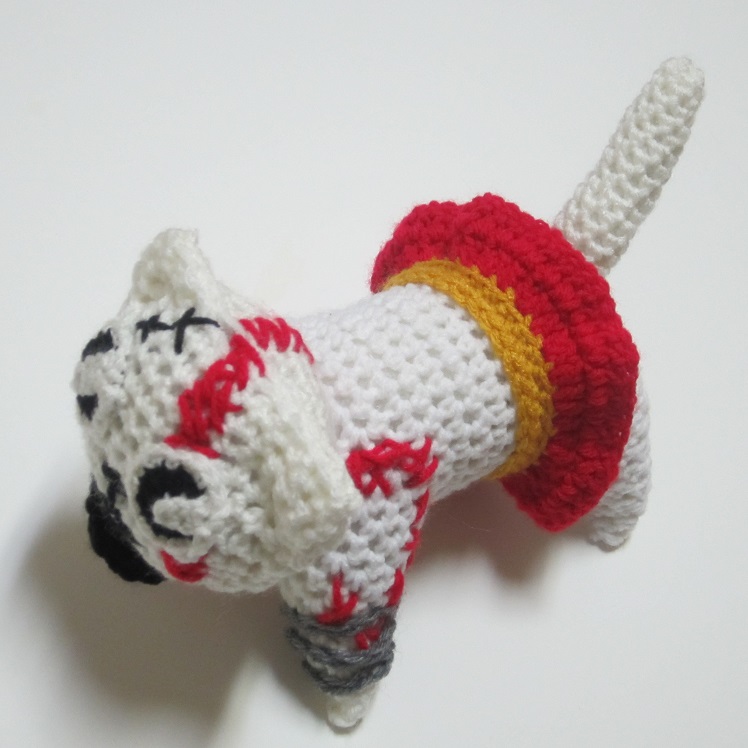
International My Chemical Romance Day!

Okay ghoulz! To celebrate International My Chemical Romance Day, (which is July 23rd), I’m gonna, of course, make a post suggesting how you can make your own crochet MCR Killjoy Mask!

It’s simple, hehehe, you either buy one of those cheep Halloween masks in the appropriate color and then either paint or use permanent marker to decorate it, or you can follow one of the many FREE crochet pattern links I’ve found for a mask shape that I will share with you further down. I prefer the idea of a cozy Killjoy sleep mask!

So, for those of you who don’t know who My Chemical Romance are, you can click here to go to the wiki page about the band, (they broke up…*sob*…but I’m still in creepy crazy denial), or you can surf around their site for as long as they still have it up where you can buy things and talk to other fanz and all that jazz here. Also, here ‘one’ of my favorite My Chemical Romance videos that might help to explain all the Killjoy stuff I keep going on about:

Now as you can see in the video, the band has different personas that they’re portraying based off of Gerard’s imagination and comic books that he wrote and published a little later, or is still publishing right now and I’ve been buying them. Gerard is the lead singer, by the way.

I’ll whip up a picture of mask inspirations, and then I’ll share the links to some FREE crochet patterns I’ve found for sleep masks/party masks for those of you with fidgety hooks ready to get started on your MCR tribute! Just pick the right colors and use a yarn needle to stitch on the embellishments like you see in my inspiration image bellow! (Or felt if you think that would be easier to shape and add to the mask.)

Here’s my MCR Killjoy Mask Inspiration Picture:

Killjoy Mask Inspiration

I have found four FREE crochet mask patterns, so just click on the picture to take you to those awesomely-awesome-sauce sites to check them out:

58a851755e9f64603a7bf64cce23aaf3 dc7fc99b1039c7c8db90d8dcc78e1b77 d15ba20cc009488cbd5d4fa8f58431c3 230a49e7f1172b522858dcf585944ac0

And remember to keep running, Killjoys.

*sob*

Why did the band have to break up???

*sniffle*

OH WHYYYYYY????!!!!!!!!!!!!!!!

*pulls hair*

Okay..okay…I’m okay. It’s alright now. Everything’s okay. Breath.

Posted in Uncategorized | Tagged , , , , , , , , , , , , , | Leave a comment

More patterns to come; eventually…

To all my crafty little ghouls~

I might be adding a lot more patterns than I usually do over the next few months. I had been trying to test if I’m well enough to run a little Etsy shop and sell some patterns, but after several months it appears that my conditions are still too much on me to do much of any kind of organized, productive type of thing. *sigh* But rather than push myself and wind up relapsing worse than before, I know I need to find a way to let go of the goal in the back of my mind that keeps pushing me to attempt the whole Etsy shop thing. It’s just too much for me to handle, so it looks like I’ll be publishing a handful of my patterns on here for free to make sure I stop trying to be hard to get along with and putting too much pressure on myself.

I just get so frustrated sometimes when I realize I just. Can’t. Do the things that would make me feel more secure. It’s not that I’m not intelligent enough to come up with ways of making money and such, it’s simply that I can’t handle any kind of pressure or anxiety, most of the time I can’t even handle good stress. The years roll on and it isn’t getting better. But, hey! At least the whole Craftyghoul site and Facebook page has turned out to be something I CAN do, and that is very comforting because it makes me feel like I have a place in society to belong where I’m helpful and can give back a little, no matter how limited what I have to offer may be!

But that’s it! Keeps your eyes open for new free patterns!

Yours Truly,

~ Starling

Posted in Uncategorized | Leave a comment

Dragon Doll Crochet Pattern

Dragon Doll Pattern

il_570xN.445426860_hz1q

*I use a size K hook unless otherwise stated and Red Heart Super Savor Yarn. I kind of went weird trying to describe which colors to use, but you can ignore my color change suggestions and it’s pretty easy to assume when you switch to the color you want and where to do that, haha!

*I sometimes want to make smaller versions of my doll patterns, and I use an H hook instead of the K hook, and that seems to work out fine for me as well. This dragon is about 15 inches tall when using a K hook when you stand him on his feet, not counting the height of the horns.

Body:

Rnd 1: With color A, Ch 3, dc 8 in 3rd chain from hook, jn in first dc with sl st. (8 dc not including first ch-3)

Rnd 2: Ch 2. Working in back loops only, 2 dc in same st, 2 dc in each st around. Jn with sl st in first dc. (16 dc not including first ch-2) Working in the back or front loops when specified will help give the dragon it’s scaly appearance.

Rnd 3: Ch 2. Working in back loops only, dc in same st, 2 dc in next st, (dc in next st, 2 dc in next st) around. Jn with sl st in first dc. (24 dc not including first ch-2)

Rnd 4: Ch 2. Working in back loops only, dc in same st and next st, 2 dc in next st, (dc, dc, 2dc), around. Jn with sl st in first dc. (32 dc not including first ch-2)

Rnd 5: Ch 2. Working in back loops only, dc in same st and around. Jn with sl st in first dc. (32 dc not including first ch-2)

Rnd 6: Ch 2. Working in back loops, dc in same st and in next 10 st, dc in the front loop only of the next one st. Do not fasten off, but switch to color B. With color B and working in the back loops, dc in the next 8 st, do not fasten off. With a seperate end of the yarn of color A, dc the front loop of next st, and then dc in the back loops on the last 11 st. Jn wih a sl st. (32 dc not icluding first ch-2.)

Rnd 7: Ch 2, turn and work in opposite direction now. Working in front loops, (because the work is now facing the opposit direction with the right side away from you), dc in same st and in next 10 st, dc in the back loop of next st. Do not fasten off, but pick up color B where you left it and with color B dc in the front loops of the next 8 st, do not fasten off, but pick up the very first strand of color A where you left it, and use that to dc in the back loop of next st and in the front loops of the last 11 st. Jn with sl st in first dc. (32 dc not including first ch-2)

Rnd 8: Ch 2, turn and work in opposite direction. (Right side will be facing you once again now.) Working in back loops, dc in same st, dec, dc in next 4st, dec, dc in next 3 st, dc in the front loop of next st. Switch to color B. Working in back loops, dc in next 2 st, dec, dc, dec, dc. Switch to color A. Dc in the front loop of next st. Then working in back loops only, dc in next 2 st, dec, dc in next 4 st, dec, dc in last st, jn with a sl st in first dc.

Rnd 9: Ch 2, turn and work in opposite direction. Working in front loops, dc in same st, dec, dc, dec, dc, dec, then dc in the back loop of the next st. Switch to color B. Working in front loops, dc, dec, dec, dc. Switch to color A. Dc in the back loop of next st, then in the front loops, dec, dc, dec, dc, dec, dec. Jn with sl st in first dc.

Rnd 10: You can now fasten off the other rows as you go and use the color A strand you have at the end of this row to finish off the body. Ch 2, turn and work in the opposite direction so that the right side is facing you. In back loops only, dc in same st and in the next 6 st, dc in the front loop of the next st. (Fasten off and change to color B.) Working in back loops, dc in the next 4 st. (Fasten off and change to color A for the last time.) Dc in the front loop of next st and in the back loops of the last 7 st. Jn with a sl st in first dc. (20 dc not counting first ch-2)

Rnd 11: Ch 2. Working in back loops, dc in next 8 st, dc in the front loops of next 4 st, dc in the back loops of last . Jn with a sl st in first dc. (20 dc including first ch-2)

Rnd 12: Ch 2. Working in back loops, dc in next st and around. Jn with sl st in first dc. (20 dc including first ch-2.)
Head:

Rnd 1: With color A, Ch 3, dc 8 in 3rd chain from hook, jn in first dc with sl st. (8 dc not including first ch-3)

Rnd 2: Ch 2. Working in back loops only, 2 dc in same st, 2 dc in each st around. Jn with sl st in first dc. (16 dc not including first ch-2)

Rnd 3: Ch 2. Working in back loops, dc in same st and in next 5 st. For first nostril, ch 2, sl st in the front loop of the same st, ch 2, sl st in same front loop, sl st in the front loop of the next st, ch 2, dc in the back loop of the same st, dc in the back loops of next 2 st. For second nostril, ch 2, sl st in front loop of same st, ch 2, sl st in same front loop, sl st in the front loop of the next st, ch 2, dc in the back loop of the same st. dc in back loops of the last 6 st. Jn with sl st in first dc.

Rnd 4: Ch 2. Working in back loops, dc in same st and in the next 4 st. Dc in both loops of the next st like normal. To close the nostril and stretch to the next dc, you will (yarn over, insert hook into the ch-2 of the previous row and also insert it into the top of the next dc, then yarn over, pull through first loop and ch 2, yarn over, pull through 2 loops, yarn over, pull through last 2 loops.) There should now be three stitches between the nostrils. Dec once and dc in the third. To close next notstril repeat inside the previous parenthesis. Dc in the next st as normal, then dc in back loops of the last . Jn with sl st in first dc. (17 dc not including first ch-2.)

Rnd 5: Ch 2. Working in back loops only, dc in same st and around, decreasing once between the nostrils. (There should be 3 sts, there. I just dc in the first and dec in the next two.) (16 dc not including first ch-2.)

Rnd 6: Ch 2, dc in same st, 2 dc in next st, (dc in next st, 2 dc in next st) around. Jn with sl st in first dc. (24 dc not including first ch-2)

Rnd 7: Ch 2. Working in back loops only, dc in same st and next st, 2 dc in next st, (dc, dc, 2dc), around. Jn with sl st in first dc. (32 dc not including first ch-2)

Rnd 8: Ch 2. Working in back loops only, dc in next st and around. Jn with sl st in top of first dc. (32 dc including first ch-2)

Rnd 9: Ch 2. Working in back loops only, dc in same st and next st, dc dec. (dc, dc, dec) around. Jn with sl st in first dc. (24 dc not including first ch-2 and counting the decreases as one st)

Rnd 10: Ch 2. Working in back loops only, dc in same st, dec in next st, (dc, dec) around. (16 dc not including first ch-2 and counting the decreases as one st.)

Rnd 11: Ch 2. Working in back loops only, dc dec around beginning with the same st as first ch-2. As in, you’ll be putting the first half of the first dc dec in the same st as the first ch-2. Jn with a sl st in first dc. (8 dc not including first ch-2 and counting the dc decreases as one dc.)

Stuff head and close the sphere by slip stitching across the small opening a few times. Fasten off leaving a tail long enough to sew head to body.


Cute eyes:

Use F (3.75 MM) hook.

Rnd 1: With black, Ch 2, 6 sc in 2nd ch from hook. Do not join. (6 sc)

Rnd 2: 2 sc in each st around. Jn with sl st in first sc. Fasten off. (12 sc)

Rnd 3: With white and working in back loops only, join with a sl st in any sc. Ch 1, 2 sc in same st as join, sc in back loop of next st, (2 sc in the back loop of next st, 1 sc in back loop of next st) around. Join with a sl st in 1st sc. (18 sc) For pupil, you will now chain 4 and sc in 2nd chain from hook and next 2 ch. Sl st in front loop of next st. Fasten off with tail long enought to sew pupil to eye and the eye to head. Fold strip down into the black of the eye and sew it into place.

Sew Eyes to head.
Legs (Make two):

Rnd 1: Ch 3, 8 dc in 1st chain. Jn with sl st in 1st dc. (8 dc not counting 1st chains.)

Rnd 2: Ch 2. Working in back loops only, 2 dc in same st and in each st around. Jn with sl st in 1st dc. (16 dc not counting 1st ch-2.)

Rnd 3: Ch 2. Working in back loops only, dc in same st, 2 dc in next st, (dc, 2dc) around. Jn with sl st in 1st dc. (24 dc not including 1st ch-2.)

Rnd 4: Ch 2. Working in back loops only, dc in next st and around. Jn with sl st in 1st dc. (24 dc including 1st ch-2.)

Rnd 5: Ch 2. Working in back loops only, dc in same st, dec in next st, (dc, dec) around. (16 dc not including 1st dc and counting each dec as one dc.)

Rnd 6: Ch 2.Working in back loops only, dec around. Jn with sl st in 1st dc. (8 dc not including 1st ch-2)

Rnd 7-11: Ch 2. Working in back loops only, dc in same st and around. Jn with sl st in 1st dc. (8 dc not including 1st ch 2.)
Arms (make two):

Rnd 1: Ch 3, 8 dc in 1st chain. Jn with sl st in 1st dc. (8 dc not counting 1st chains.)

Rnd 2: Ch 2. Working in back loops only, 2 dc in same st and in each st around. Jn with sl st in 1st dc. (16 dc not counting 1st ch-2.)

Rnd 3: Ch 2. Working in back loops only, dc in same st and in each st around. Jn with sl st in 1st dc. (16 dc not counting 1st ch-2.)

Rnd 4: Ch 2. Working in back loops only, beginning in same st as first ch-2, dc dec around. Jn with sl st in 1st dc. (8 dc not counting first ch-2.)

Rnd 5-10: Ch 2. Working in back loops only, dc in same st, dc in each st around. Jn with sl st in 1st dc. (8 dc not counting 1st ch-2.) Faste off leaving tail long enough to sew arm to body. Stuff arm.

Claws:
With F (3.75 MM) hook, join claw color with a sl st in one of the unworked front loops near the ends of each arm or leg. This should be the front loops of row 2 on each arm and leg. Sl st in next st, * ch 4, sl st in 2nd ch from hook and in the next 2 chains, sl st in next 2 st. Repeat from * twice. Fasten off and weave in ends.

Sew arms, legs, and head to body.
Tail:
Returning to your K hook, ch 25. Dc in 3rd ch from hook and in next 9 ch, hdc in next 10 ch, sc in next ch, sl st in last 2 chains. Ch 2, work 8 dc in the same last chain, ch 2, sl st in same last ch, and pivot tail to begin working back up the tail on the opposite side of the chain. Sl st in next ch. You will be mirroring the stitches of the first side back up the tail. Sc in next ch, hdc in next 10 ch, dc in last 10 ch, ch 2, sl st in same last ch. Fasten off leaving a tail long enough to sew tail to body. Sew Tail to body.
Spikes down head and back:

With K hook: ch 58, Sl st in 2nd ch from hook. *(sc, dc, ch 1, tr, ch 1, dc, sc) in next ch, sl st in next 4 st. Repeat from * across. Sew spikes down center of the back of the dragon beginning at the top of the head to just before the circle at the end of the tail. Weave in ends.

Spikes around end of tail:

Jn with a sl st in the far st of the circle. Working in the front loops: ( sl st in next st, ch 4, sl st in 2nd ch from hook and in next 2 chains, sl st in next st) 3 times. Sl st in next st, ch 4, sl st in 2nd ch from hook and in next 2 chains, then sl st in the tail one last time. Fasten off and weave in ends.


Horns: (Make two.)
Rnd 1: Ch 16, jn with sl st in first ch. Ch 2, dc in same st and around. Jn with sl st in first dc. (16 dc not including first ch-2.)

Rnd 2: Rnd two will be worked in the original chain so that the top of rnd 1 can be attached at the head as the bottom of the horn. That will make the horn a more smooth shape. So chain 2 and jn with a sl st in the original chain. Ch 2, dc in same chain and around. Jn with sl st in first dc. (16 dc not including first ch-2.)

Rnd 3: Ch 2, dc in same st and the next st, decrease.(dc, dc, dec) around. Jn with sl st in first dc. (12 dc not including first ch-2.)

Rnd 4: Ch 2, hdc in same st and next 2 st, dc in next 6 st, hdc in last 3 st. Jn with a sl st in first hdc. (12 st not including first ch-2.)

Rnd 5: Ch 1, sc in same st and next 2 st, dc in next 6 st, sc in last 3 st. Jn with a sl st in first sc. (12 st.)

Rnd 6: Ch 1, sc decrease, sc, dc in next 6 st, sc, sc decrease. Jn with a sl st in first sc. (10 st.)

Rnd 7: Ch 1, sl st in same st, ch 1, sl st in next st, dc, dc, double crochet decrease once, dc, (dc, ch 1) sl st in next st, ch 1, sl st in last st. Jn with a sl st in first chain. (10 sts.)

Rnd 8: Ch 1, sc, sc, dc in next 6 st, sc, sc, join with a sl st in first sc. (10 sts.)

Rnd 9: Ch 2, dc in same st, (double crochet decrease, dc) around. Jn with sl st in first dc. (7 dc not including first ch-2.)

Rnd 10: Ch 2, double crochet decrease around, dc in last st. Jn with a sl st in top of first dc. Sl st to close the tip of the horn.

il_570xN.442208893_qe99

il_570xN.445427254_plh6

Posted in Uncategorized | Tagged , , , , , , , , , , , , , , , , , , | Leave a comment

Easily Adjustable Crochet Slippers Pattern

I know it can be difficult to figure out how to make things in just the right size for you, especially when there are a ka-zillion different patterns out there using unfamiliar yarn and hook sizes you just want to forget about use your favorite one instead. Here a simple concept pattern that can be easily adapted for your cold lil’ toes!

Easily Adjustable Crochet Slippers

slipper 1

* I use a size N (9.00 MM) hook and Lion Brand Super Bulky (6) yarn.
Toes (Front of the slipper):

Ch 4, jn in the first ch to form a ring.

Rnd 1: Ch 1, 8 sc in ring. Jn with a sl st in first sc. (8 sc)

Rnd 2: Ch 2, hdc in same st as jn. 2 hdc in the next st., (hdc, 2hdc) around. Jn with a sl st in first hdc. (12 hdc)

Rnd 3: Ch 2, hdc in same st as jn. Hdc, 2hdc, (hdc, hdc, 2hdc) around. Jn with a sl st in first hdc. (16 hdc)

* Size adjustment note: The point of these rounds is for the tip of the toes to get wider until you are ready to continue on in single hdc rounds to create a straight, cylindrical shape. When the toes are wide enough, you can stop increasing and skip to round 5, but if you want the shoe wider than what I have here then you can continue the increase pattern for another few rounds. For example: Rnd 2 was (hdc, 2hdc) around, Rnd 3 was (hdc, hdc, 2hdc) around, Rnd 4 is (hdc, hdc, hdc, 2hdc) around, so if you add another increase round it would be (hdc, hdc, hdc, hdc, 2hc) around. Make sense?

Rnd 4: Ch 2, hdc in same st as jn. Hdc, hdc, 2hdc, (hdc, hdc, hdc, 2hdc) around. Jn with a sl st in first hdc. (20 hdc.)

Rnd 5-?: Ch 2, hdc in same st and in each st around. Jn with a sl st in first hdc. (20 hdc in each round.) Repeat Rnd 5 until slipper is long enough for you to begin creating the opening. (For me this will wind up being Rnds 5-12.)
Divide for sides and sole:

*You will now be working back and forth, turning the work, rather that all the way around.

Row 1-?: Ch 2, turn work. Hdc in same st and around, but don’t join. Instead, Ch 2, turn, hdc in same st and back around. Work the rows back and forth in this way until the slipper is long enough to close behind the heel. Turn the slipper in-side-out (right sides together) and stitch the heel closed at the end. (I have 8 rows here.)
Top/ankle:

Rnd 1: Jn with a sl st in the center of the heel. Ch 2, hdc in same st and around, accept you will be adding 6 decreases around the top of the shoe. Once at the beginning, once on each side, once in each of the front corners, and once at the very end of the round. Jn with a sl st in first hdc.

Rnds 2-?: Read the size adjustment note for ankle first, and then carry on with this round. Ch 2, hdc in same st and in each st around. Join with a sl st in first hdc. Repeat Rnd 2 until the ankle is as tall as desired. Then fasten off and weave in ends. (I have 5 rounds when I’m finished.)

*Size adjustment note for ankles: You can adjust the width of the ankle in the rounds to come. If you want it tighter, decrease evenly 4 to 6 times around the ankle. If it’s tighter than you’re comfortable with you can increase in a few places evenly around. Join with a sl st in first hdc and repeat round 2, adjusting as desired, until the ankle is as tall as you’d like.

Bobble Round:

If you’d like to add a bobble round the way I did, then I used normal Red Heart Yarn and a size K hook. I worked this round after the 5 ankle rounds in red. So this would be round 6.

Jn with a sl st in the center of the back. Working in the back (inside) loops only, Ch 2, do a 4dc bobble, then in the next st and in each st around work a 5dc bobble. Join with a sl st in top of first bobble.

How to 5dc bobble: (YO, insert hook and pull up a loop, yo, pull through 2 loops on hook) 5 times, yo, pull through all 6 loops on hook.

I then added one more hdc round with the chunky red yarn and then one last single crochet round on top of that.

slipper 2 slipper 3

Posted in Uncategorized | Tagged , , , , , , , , , , | 14 Comments

Blanket for my mom!

Check out this sunflower blanket I made for my mom awhile back! She was soooooo happy with it! The pattern is from a crochet magazine I had on hand , and you can buy it here. I saw some pictures where people used Christmas colors on this and those were cute too!

sunflower throw 1

sunflower throw 2

Posted in Uncategorized | Leave a comment

Octopus Crochet Pattern

I have been told that this octo-pattern looks a lot like the Squiddles in Homestuck, and since I’m a fan that pleases me greatly! I made this pattern as any kind of fun octo-friend, though, so if you have no idea what I’m talking about or what a ‘Squiddle’ is, haha, don’t worry! Stitch yourself one of these little guys anyway!

I worked hard on creating this pattern, and it should only be used for personal….well…okay. If you make me one of these and send it to me so I can be knee-deep in squishy friends, I can probably be talked into not caring if you make them to sell. I made one for myself, but my attention span is pretty low, so even though I want a dozen, it probably won’t happen. *snort* So, if you want to make a pile to sell, I’ll trade ya! Make me one! Muahahahahaha! But don’t copy the pattern and sell it as your own or go corporate with their construction so that I’m left crying about how I could have been the rich one. *sob*

Okay. I’ll stop blabbing. Here’s the pattern:

squiddle two

Octopus Crochet Pattern

*I use a size K hook for the top dome of the body and the bottom closure, and an H hook for the ridge and the legs. I have only one hook for all of it a few times when I was making one of these away from the house and only had one hook with me, though, and it seems to work out pretty well without a major difference. If you decide to use one hook, you might want to add a couple fewer chains on the legs and an extra round or two on the body.

*I either use Red Heart Super Savor yarn or Caron Simply Soft yarn, ’cause those are my favorite!

Body:

*Work in a spiral. Use K hook.

Rnd 1: Ch 3, in 3rd ch from hook, work 6 hdc. (6 hdc)

Rnd 2: Work 2 hdc in each st around. (12 hdc)

Rnd 3: (2hdc, hdc) around. (18 hdc)

Rnd 4: (2hdc, hdc, hdc) around. (24 hdc)

Rnd 5: (2hdc, hdc, hdc, hdc,) around. (30 hdc)

Rnd 5-9: Hdc in each st around. (30 hdc in each rnd)

Rnd 10: Working in the back (inside loops) only, hdc around. In a minute you’ll begin working the ridge in the outside loops that you’re ignoring now; that way when you fold the ridge under and attach it to the body, this round will be here for you to stitch it to. Jn with a sl st in first hdc. (30 hdc)

*Ridge begins with Rnd 11, so switch to the H hook.

Rnd 11: Ch 2 so that you can more easily join with a sl st in the front (outside) loop of round 9. To be specific, you will NOT be working in the front loops of round 10, but instead one round up where there is that empty line of loops. I guess that would make this technically not round 11, but round 1 of the ridge, but it just felt right to keep on going with the count this way since I never fastened off. Ch 2, and then work 2 hdc in the same loop as join, hdc in the next front loop, (2hdc, hdc) in each front loop around. Jn with a sl st in first hdc. (45 hdc)

* Rnd 10 is now hidden by Rnd 11.

Rnd 12-13: Ch 2, hdc in the same st as join. Hdc around. Jn with a sl st in the first hdc. (45 hdc)

Rnd 14: Ch 1, hdc in same st as join. Decrease, (hdc, dec) around. Jn with a sl st in the first hdc.

Rnd 15: Repeat Rnd 12. At the end of this round, you’ll kind of fold the ridge under and stitch it to the top of round 10; stuffing it as you go along.

Bottom of Octo-body:

*With a K hook:
Rnd 1: Ch 2, work 8 hdc into 2nd ch from hook. Jn with a sl st in first hdc. (8 hdc)
Rnd 2: Ch 1, 2 hdc in same st, 2hdc in each st around. Jn with a sl st in first hdc. (16 hdc)
Rnd 3: Ch 1, hdc in same st, 2hdc in next st, (hdc, 2hdc) around. Jn with a sl st in first hdc. (24 hdc)
Rnd 4: Ch 1, sc in same st, sc, 2sc, (sc, sc, 2sc) around. Jn with a sl st in first sc. (32 sc) Fasten off leaving tail long enough to sew to bottom of body, stuffing first and then stuffing a little more as you near closing the circle.

Squiddle bottom and ridge attachment
Legs:

(Make however many you think is appropriate. Yeah, yeah! I know ‘octo’ insinuates that there should be eight legs, haha!  I make six, though, because I think that just looks better.)

*The legs are worked in rows long-ways and then stitched together up the sides, stuffing as you go. Use an H hook.

*Before you make your beginning chain, be sure to leave about a 4-6 inch tail so that you can use that later, after you stuff the tentacle, to stitch the end closed. When you fasten off at the end you should leave the tail long enough to stitch the leg closed up the side and also to sew the tentacle to the bottom of the body.

Rw 1: Remember to leave a 4-6 inch tail at the beginning. Ch 17. Hdc in 3rd ch from hook and across. (15 hdc)

Rw 2: Ch 2, turn. Hdc in same st (very first) stitch and in each st across. (15 hdc)

Rws 3-7: Repeat Row 2. At the end of row 7, fasten off leaving a tail long to sew the tentacle closed along the sides and also to sew the tentacle to the bottom of the body. Use the tail you left at the very beginning to stitch the opposite end closed giving it a rounded appearance.

*Note about the floppy-factor of the legs: I personally thing the legs look really nice sewn onto the body in a round fashion so that the top of the tentacle remains in a circle as you stich along. This puts it stiff against the body and makes them stand up like they’re an exclamation mark. But I also like floppy octo-tentacles. If you want more floppy tentacles, then before you stitch the legs to the body, first pinch the top in half and sew the top closed so that you only sew in a single line when attatching it to the body rather than in a circle. Then the tentacles will be more wriggly.

Squiddle leg attachment
Eyes:

(Make two)

Working in a spiral without joining:

Rnd 1: Ch 2, 6sc in 2nd ch from hook. (6 sc)

Rnd 2: 2sc in each st around. (12 sc)

Rnd 3: (2sc, sc) around. (18 sc) Then sl st in the next 2 sts. Fasten off leaving a tail long enough to sew eye to body.

Sew the eye to the body, and then use white to stitch some glossy lines for a more innocent, wide-eyed appearance!
Mouth:

I prefer the look without a mouth at all, or to use felt to cut out a mouth to sew on, however, if you are a crochet-mouth fan, then here is a shaply-smiley pattern for one.

Ch 6, sc in 2nd ch from hook, hdc, dc, hdc, (sc, sl) in last ch. Fasten off leaving tail long enough to sew mouth to body.

And now you’re done! Well, other than looking at this picture with my cat in the background. Isn’t Mizzy Kitty so pretty?? Yep.

Mizzy and squiddle

Posted in Uncategorized | Tagged , , , , , , , , , , , , , , | Leave a comment

My Shy Guy variation of a Creepy Cute Crochet Figure!

shy guy 1

I used a pattern in the Creepy Cute Crochet book I have and tweeked it around, (also adding some of my own designs), to make a Shy Guy for my husband! (Shy Guy is a character from a Mario Bros. video game.)

If you are interested in the book I mentioned, you can find it on amazon here: Creepy Cute Crochet, by Chriten Hayden

When I was a beginner at crocheting, I had a lot of trouble following the patterns in this book, but I was still happy with my purchase simply for the inspiration pictures alone! Then when I gained only a little bit of experience I was able to follow along with the patterns and easily assume the little things she doesn’t specify in the patterns that should have been common sense for an intermediate crocheter, but I just didn’t know what I was doing at the time. Now I have much experience and I don’t have to think twice about how to tweak the patterns to make all kinds of creative things! Ultimately I’m really , really glad I got this book, and I would recommend it even if it’s just to look at inspiration pictures for the critters inside!!

Now! On to more Shy Guy Pictures, and then I will share the things I did to make him, but to get the body, head, and hood pattern, you’ll need to buy the book because it isn’t my pattern to share; so I’m not going to classify this as a free pattern, but instead it’s like an accessory pattern for those of you that have the Creepy Cute Crochet book.


shy guy 2 shy guy back view


Shy Guy Creepy Cute Crochet Variation
(Accessory Pattern Only! Does not include body, hood, or head pattern from book!)

* I used an F hook for the body, head, hood, and everything accept for the mask.. On the mask I used a K hook.

Mask:
Use K hook for Mask:

Rnd 1: Ch 2, 6sc in first ch. (6 sc)

Rnd 2: 2 sc in each st around. (12 sc)

Rnd 3: (2sc, sc) around. Jn with a sl in next st. (18)

Rnd 4: Ch 2, dc in same st as join. Dc in next st, (dc, hdc) in next st, hdc, sc, 2sc, sc, hdc, (hdc, dc), dc, dc, (dc, hdc) hdc, sc, 2sc, sc, hdc, and join with a sl st in first dc.
For head strap that holds mask on:

With F hook, ch 27, sc in 2nd ch from hook and across. Fasten off.

For belt strap:

With F hook ch 36. Fasten off leaving tail long enough to sew to body. Then with a little yellow yarn and a yarn needle add buckle in front.

Eyes:
(Make two.)

Ch 2, in 2nd ch from hook work 6sc. Jn with a sl st in first sc. Fasten off leaving tail long enough to sew to mask. I leave an extra long tail on one eye so that I can use the excess to feed down the mask and stitch his mouth.

Mouth:

I simply stitch the mouth with leftover yarn from the eyes.

Feet:

I repeated the mask pattern and used blue. Then sew to the bottom of body for balance.
Arms:

Rnd 1: Ch 10 and jn with sl st in first ch. Ch 1, sc in same st and around. Jn with sl st in first sc. (10 sc)

Rnd 2: Ch 2 and flip work so that you’ll be working in the original chain once again. Sl st in any ch. (Or you can faste off at the end of Rnd 1 and join in original ch with a sl st if you’d like for the arm to be perfectly smooth.) Ch 1, sc in same st and around. Jn with sl st in first sc. (10 sc)

Rnd 3: Ch 1, sc in same st as join. Sc in next st, decrease, sc, sc, decrease, sc, sc, and then join with a sl st in the first sc. (You should now have 8 stitches to work the next rnd into.)

Rnd 4: Ch 1, decrease around using the same st as join in your count. Jn with a sl st in first sc. (4 stitches.) Now to make the arm a little more pointy, chain 3, sc in 2nd ch from hook and in next ch, then join with a sl st in the arm wherever you can make it look even. Fasten off. Stuff arm and sew to body.


Posted in Uncategorized | Leave a comment

Kitty of War!

I made this lil’ crochet kitty from a free pattern you can find here. Then I dug up a whole bunch of Kratos inspiration pictures (from the video game God of War) and set to work adding all the extra detail! Valtiel is really happy with his Kitty of War gift! Behold!!!!!

IMG_2706

IMG_2708

IMG_2712

IMG_2713

IMG_2715


And while we’re on the topic of the God of War video game, I guess I should go ahead and throw in a picture of a little bird I doctored up to become Bird of War!!!

Bird of War

Posted in Uncategorized | Leave a comment

Peacock Spam Day! May 11th!

Peacock Spam Day

(Here’s a link to my Craftyghoul Facebook Page)

Posted in Uncategorized | Leave a comment

Repainted Goodwill Find: Bird Wall Decor

Check it out! I found two hanging bird wall decorations at the Goodwill, washed them, and gave them a new coat of paint! They’re going to look great in our living room with my bird and lush nature theme going on! I put the before and after pictures right next to each other so y’all can see the difference! I’m so proud of my painstaking detail work, lolz!

Goodwill painted birds


Goodwill painted birds2

Posted in Uncategorized | Tagged , , , , , , , , , | Leave a comment